Playback starts YouTube’s embedded player (privacy-enhanced mode).
Embroidered IRON-ON PATCH Tutorial | Make Uniforms Fast | FREE Embroidery Design (EMB Hub Ep115)
ChannelRicoma Embroidery MachinesDescription from the creator
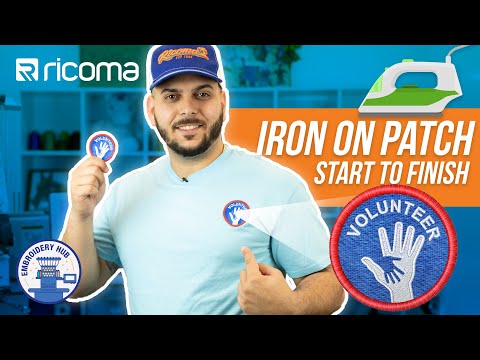
This week on Embroidery Hub, we’re teaching you how to embroider iron-on transfer patches! This technique is a fast and easy way to iron on patches to any garment like T-shirts and polo shirts to quickly make uniforms for volunteers or to simply add flair to any garment.
Just like our previous episodes, we’ve created our own design for this project, which you can download for FREE in the description down below. With the high demand for volunteers to help businesses during these uncertain times, it’s important to come up with innovative ways to help your community.
To create this iron-on patch, we used a few materials that you might already have in your embroidery arsenal. The materials you’ll need are a pair of curved tip scissors, two sheets of cutaway stabilizer, a lighter, an Ultra Hold Heat n’ Bond fusible sheet, and a D hoop (or any size hoop that comes with your particular machine).
We also break down the cost of the materials and show you how much patches are typically sold for on Etsy. That way, you can get a good idea of the ROI you can expect per patch.
Begin this project by hooping the stabilizer and loading it onto your machine. In this episode, we are using Ricoma’s MT-1501 embroidery machine.
Once you load the “Volunteer” file located below onto your machine, choose your desired color scheme for the patch (we already chose ours). Trace your design and press start. For the purpose of this video, we are only embroidering one patch, but you can choose to embroider multiple patches by duplicating the file. You can also use a larger hoop to create multiple patches at once.
When the patch has finished embroidering, use the curved tip scissors to precisely cut the outline of the volunteer patch. Flip the patch over and cut any excess thread. Finally, use a lighter to burn the stabilizer around the edge of the patch and any other loose thread.
Next, you will place a piece of Ultra Hold Heat n’ Bond fusible sheet on the back of the patch (make sure it’s the textured side). Take your iron and press the Heat n’ Bond onto the patch in increments of 6 seconds. This will help the glue adhere to the patch. Keep doing this process until you see that the paper becomes see-through. Flip it over and let it rest for a few minutes.
Cut around the edge of the paper with your curved scissors. Then you can remove the paper from the patch, revealing its sticky back.
Finally, to adhere the patch to the t-shirt or polo, place it on the left chest. Now place an extra piece of fabric on top to protect the patch while ironing it. Iron over it until the patch has fully adhered to the t-shirt.
There you have it: iron-on, embroidered patches from start to finish! Ready to begin embroidering? Download the design below.
Learn more about the Ricoma MT-1501
ricoma.com/US/machine/mt-1501
Heat n Bond® Iron-on Adhesive, Ultrahold
joann.com/heat-n-bond-ultrahold-1yd/1440536.html
DIY Latex Gloves | How to EMBROIDER REUSABLE gloves at home (EMB Hub Ep112)
youtube.com/watch?v=Ot5OulHUGZo
EMBROIDER a REUSABLE FACE MASK with FILTER / DIY Face Mask Tutorial / NO SEWING! (EMB Hub Ep111)
youtube.com/watch?v=K6LrCw49NNg
Mass Production Face Mask Tutorial / DIY Double Layer Fabric Face Mask Embroidery (EMB Hub Ep113)
youtube.com/watch?v=NrlUIkkbHQE
DIY In The Hoop Hand Sanitizer Holder | Free Machine Embroidery Design | (EMB Hub Ep114)
youtu.be/7W4EQPSyomY
Download the Free Designs
hoopmade.com/designs/Embroidery%20Hub
------------------------------------------------------------------------------------------------
Facebook Embroidery & Custom Apparel Mastery Group: facebook.com/groups/embroiderymastery/
Join the Ricoma newsletter for educational blogs, videos, and live webinars: ricoma.com/US/insights
To learn more schedule a virtual demo today:
ricoma.com/US/virtual-demo
Get our latest Ricoma embroidery youtube videos sent straight to your Facebook Messenger!: manychat.com/l2/RiCOMA.us
To learn more about our embroidery machines, visit our website:
ricoma.com/
Just like our previous episodes, we’ve created our own design for this project, which you can download for FREE in the description down below. With the high demand for volunteers to help businesses during these uncertain times, it’s important to come up with innovative ways to help your community.
To create this iron-on patch, we used a few materials that you might already have in your embroidery arsenal. The materials you’ll need are a pair of curved tip scissors, two sheets of cutaway stabilizer, a lighter, an Ultra Hold Heat n’ Bond fusible sheet, and a D hoop (or any size hoop that comes with your particular machine).
We also break down the cost of the materials and show you how much patches are typically sold for on Etsy. That way, you can get a good idea of the ROI you can expect per patch.
Begin this project by hooping the stabilizer and loading it onto your machine. In this episode, we are using Ricoma’s MT-1501 embroidery machine.
Once you load the “Volunteer” file located below onto your machine, choose your desired color scheme for the patch (we already chose ours). Trace your design and press start. For the purpose of this video, we are only embroidering one patch, but you can choose to embroider multiple patches by duplicating the file. You can also use a larger hoop to create multiple patches at once.
When the patch has finished embroidering, use the curved tip scissors to precisely cut the outline of the volunteer patch. Flip the patch over and cut any excess thread. Finally, use a lighter to burn the stabilizer around the edge of the patch and any other loose thread.
Next, you will place a piece of Ultra Hold Heat n’ Bond fusible sheet on the back of the patch (make sure it’s the textured side). Take your iron and press the Heat n’ Bond onto the patch in increments of 6 seconds. This will help the glue adhere to the patch. Keep doing this process until you see that the paper becomes see-through. Flip it over and let it rest for a few minutes.
Cut around the edge of the paper with your curved scissors. Then you can remove the paper from the patch, revealing its sticky back.
Finally, to adhere the patch to the t-shirt or polo, place it on the left chest. Now place an extra piece of fabric on top to protect the patch while ironing it. Iron over it until the patch has fully adhered to the t-shirt.
There you have it: iron-on, embroidered patches from start to finish! Ready to begin embroidering? Download the design below.
Learn more about the Ricoma MT-1501
ricoma.com/US/machine/mt-1501
Heat n Bond® Iron-on Adhesive, Ultrahold
joann.com/heat-n-bond-ultrahold-1yd/1440536.html
DIY Latex Gloves | How to EMBROIDER REUSABLE gloves at home (EMB Hub Ep112)
youtube.com/watch?v=Ot5OulHUGZo
EMBROIDER a REUSABLE FACE MASK with FILTER / DIY Face Mask Tutorial / NO SEWING! (EMB Hub Ep111)
youtube.com/watch?v=K6LrCw49NNg
Mass Production Face Mask Tutorial / DIY Double Layer Fabric Face Mask Embroidery (EMB Hub Ep113)
youtube.com/watch?v=NrlUIkkbHQE
DIY In The Hoop Hand Sanitizer Holder | Free Machine Embroidery Design | (EMB Hub Ep114)
youtu.be/7W4EQPSyomY
Download the Free Designs
hoopmade.com/designs/Embroidery%20Hub
------------------------------------------------------------------------------------------------
Facebook Embroidery & Custom Apparel Mastery Group: facebook.com/groups/embroiderymastery/
Join the Ricoma newsletter for educational blogs, videos, and live webinars: ricoma.com/US/insights
To learn more schedule a virtual demo today:
ricoma.com/US/virtual-demo
Get our latest Ricoma embroidery youtube videos sent straight to your Facebook Messenger!: manychat.com/l2/RiCOMA.us
To learn more about our embroidery machines, visit our website:
ricoma.com/
About this tutorial
Ricoma Embroidery Machines published this 8:59 video tutorial on May 28, 2020. It has been watched 93,381 times on YouTube.
- Channel
- Ricoma Embroidery Machines
- Category
- Howto & Style
- Duration
- 8:59
- Published
- May 28, 2020
- Views
- 93,381
- Likes
- 1,775
Tags
Share
This tutorial in other languages
- FRBrodé IRON-ON PATCH Tutorial | Faire Uniformes rapide | Broderie Design GRATUIT (EMB Hub Ep115)
- ESBordó el hierro-en remiendo Tutorial | Hacer Uniformes rápido | LIBRE del diseño del bordado (EMB Hub Ep115)
- PTBordado IRON-ON PATCH Tutorial | Faça Fardas Rápido | GRÁTIS projeto do bordado (EMB Hub Ep115)
- ITRicamato il ferro-sulla zona Tutorial | Fare Uniformi Veloce | LIBERO di disegno del ricamo (EMB Hub Ep115)
- DEGestickte IRON-ON PATCH Tutorial | Machen Uniformen Schnell | FREE-Stickerei-Entwurf (EMB Hub Ep115)
- NLGeborduurde Opstrijk Tutorial | Maak Uniformen Fast | FREE Embroidery Design (EMB Hub Ep115)
- RUВышитые IRON-ON PATCH Учебное пособие | Сделать Форменная Быстро | СВОБОДНЫЕ вышивки (EMB-концентратор Ep115)
- PLHaftowane Na łacie Tutorial | Dokonaj Mundury Szybkie | DARMOWE Haft Design (EMB Hub Ep115)
- JA刺繍IRON-ON PATCHチュートリアル|高速ユニフォームを作ります|無料刺繍デザイン(EMBハブEp115)
- ARمطرز IRON-ON PATCH دروس | جعل الزي الرسمي سريعة | مجانا تصميم التطريز (EMB محور Ep115)
- HIकढ़ाई लौह-ON PATCH ट्यूटोरियल | वर्दी फास्ट बनाओ | मुफ्त कढ़ाई डिजाइन (EMB हब Ep115)
- IDBordir BESI-ON PATCH Tutorial | Membuat Seragam Cepat | GRATIS Bordir Desain (EMB Hub Ep115)