Playback starts YouTube’s embedded player (privacy-enhanced mode).
How To Build A Hitching Post For Your Horse
ChannelThe Budget EquestrianDescription from the creator
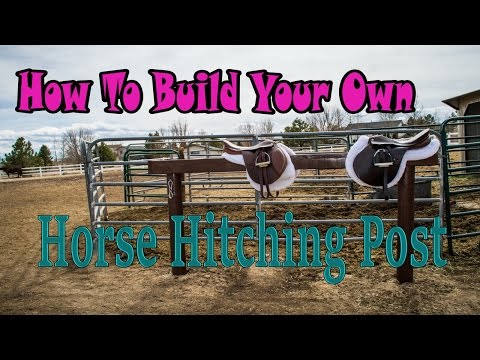
You can build your own hitching post/rail for your horse for about 50.00, depending on where you live.
I have wanted this for as long as I have lived in my house, and I have FINALLY built it!!!
It is a hitching rack, but I use a Blocker tie ring that I have connected to the post, because the post has been set into concrete. So between the blocker tie ring, and the concreted 6" wide post, it is very safe.
I built this like a rail so I can set my tack, saddles, blankets, etc. on it and have them close by when I am tacking up to ride.
What I used to make this Hitching rail:
(2) 6" wide round posts that are 8 feet long
(3) 2 x 6 x 8' boards that I cut down to 7' long
(1) bag of quick crete concrete mix
18v drill
Rustoleum gloss brown paint and a paint brush
3" decking screws
wood glue
First we dug the holes for the posts. I measured how far apart I wanted the posts to be, and it ended up being about 6 1/2 apart. We used a post hole digger to make quick work of the dirt. The holes are about 4 feet deep.
Once the holes were dug, I put the posts in and tried to make sure they were about the same height. If I had to do it again, I would have used a level just to make sure it was perfect.
When I was happy with the depth of the holes, and how the posts were sitting, I used a half a bag of the concrete mix and dumped it into each hole. And then I filled the rest of the hole with the dirt that had been removed. I did use a tamper to make sure the dirt was firmly packed around each post.
I waited a day, and then I secured the 2 x 6's to the posts. It probably isn't going to do much, but I did add a big glob of wood glue to the posts before securing the 2 x 6 piece of wood with decking screws.
When I put on the front and back pieces, I had my husband help me, because I am not talented enough to try and hold them up on my own.
Once all of the boards were on, I took scraps of the 2 x 6's and attached them to either end, just to make the hitching rail look more complete.
Then it was time to paint. I made sure to paint all exposed areas of the wood, including the posts. I also did the inside of the the boards too, to make sure any parts that may come into contact with the weather will be protected.
After the paint dried, I attached the blocker tie ring to the post so I can tie up my horses at the post, and I know it is secure, and they will be safe.
The rail part is very handy for setting stuff on, which is the main reason I built it this way, but for safety reasons, I probably will not be tying my horses to the 2 x 6 section, I know it is sturdy, but if there is one thing I have learned from owning horses is to always expect the unexpected, and if they can find a way to get hurt, they will!
I bought my blocker ring through State Line Tack, I have a link to it on my website. I buy a lot of my horse related things from State Line Tack, because they have really good prices and ship quickly too. You can go here to see it:
State Line Tack: gopjn.com/t/SENHSk9NTk1DR0pHRkhHQ0dHTkhKTw
You can visit my website here:
thebudgetequestrian.com/
Thanks for watching, and happy building!!!
I have wanted this for as long as I have lived in my house, and I have FINALLY built it!!!
It is a hitching rack, but I use a Blocker tie ring that I have connected to the post, because the post has been set into concrete. So between the blocker tie ring, and the concreted 6" wide post, it is very safe.
I built this like a rail so I can set my tack, saddles, blankets, etc. on it and have them close by when I am tacking up to ride.
What I used to make this Hitching rail:
(2) 6" wide round posts that are 8 feet long
(3) 2 x 6 x 8' boards that I cut down to 7' long
(1) bag of quick crete concrete mix
18v drill
Rustoleum gloss brown paint and a paint brush
3" decking screws
wood glue
First we dug the holes for the posts. I measured how far apart I wanted the posts to be, and it ended up being about 6 1/2 apart. We used a post hole digger to make quick work of the dirt. The holes are about 4 feet deep.
Once the holes were dug, I put the posts in and tried to make sure they were about the same height. If I had to do it again, I would have used a level just to make sure it was perfect.
When I was happy with the depth of the holes, and how the posts were sitting, I used a half a bag of the concrete mix and dumped it into each hole. And then I filled the rest of the hole with the dirt that had been removed. I did use a tamper to make sure the dirt was firmly packed around each post.
I waited a day, and then I secured the 2 x 6's to the posts. It probably isn't going to do much, but I did add a big glob of wood glue to the posts before securing the 2 x 6 piece of wood with decking screws.
When I put on the front and back pieces, I had my husband help me, because I am not talented enough to try and hold them up on my own.
Once all of the boards were on, I took scraps of the 2 x 6's and attached them to either end, just to make the hitching rail look more complete.
Then it was time to paint. I made sure to paint all exposed areas of the wood, including the posts. I also did the inside of the the boards too, to make sure any parts that may come into contact with the weather will be protected.
After the paint dried, I attached the blocker tie ring to the post so I can tie up my horses at the post, and I know it is secure, and they will be safe.
The rail part is very handy for setting stuff on, which is the main reason I built it this way, but for safety reasons, I probably will not be tying my horses to the 2 x 6 section, I know it is sturdy, but if there is one thing I have learned from owning horses is to always expect the unexpected, and if they can find a way to get hurt, they will!
I bought my blocker ring through State Line Tack, I have a link to it on my website. I buy a lot of my horse related things from State Line Tack, because they have really good prices and ship quickly too. You can go here to see it:
State Line Tack: gopjn.com/t/SENHSk9NTk1DR0pHRkhHQ0dHTkhKTw
You can visit my website here:
thebudgetequestrian.com/
Thanks for watching, and happy building!!!
About this tutorial
The Budget Equestrian published this 5:39 video tutorial on November 8, 2016. It has been watched 35,202 times on YouTube.
- Channel
- The Budget Equestrian
- Category
- Howto & Style
- Duration
- 5:39
- Published
- November 8, 2016
- Views
- 35,202
- Likes
- 255
Tags
Share
This tutorial in other languages
- FRComment construire un Hitching Post pour votre cheval
- ESCómo construir un poste que engancha para su caballo
- PTComo construir um Hitching Post para seu cavalo
- ITCome costruire una Hitching Post per il tuo cavallo
- DEWie baue ich eine Hitching Post für Ihr Pferd
- NLHow To Build A Hitching Post voor uw paard
- RUКак построить коновязи для вашей лошади
- PLJak zbudować Hitching Post Dla konia
- JAあなたの馬のためにAヒッチングポストを構築する方法
- ARكيفية بناء استوقف المشاركة على الحصان
- HIआपका हार्स के लिए एक hitching पोस्ट का निर्माण करने के लिए कैसे
- IDCara Membangun Hitching Post Untuk Kuda Anda