Playback starts YouTube’s embedded player (privacy-enhanced mode).
How to Create an Animated GIF in Photoshop | Adobe Creative Cloud
ChannelAdobe Creative CloudIn brief
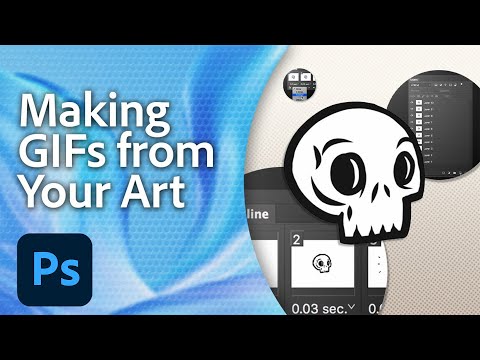
You’ll turn a series of layered drawings into a smooth, looping animated GIF using Photoshop’s Timeline panel. Perfect for artists who want to bring static sketches to life with minimal effort—no coding required. The creator provides practice files or lets you create your own variations.
Key steps
- Prepare 10+ layered drawings (e.g., skull variations) on separate layers in one Photoshop file
- Open the Timeline panel and select ‘Create Frame Animation’
- Convert layers to frames with ‘Make Frames From Layers’
- Set animation to loop ‘Forever’ and preview playback
- Export as GIF via ‘Save for Web (legacy)’ with ‘Forever’ looping
Questions & answers
Can I use my own drawings instead of the practice files?
Yes. Create your own variations with the Brush tool on separate layers.
Description from the creator
Want to learn how to create fun GIFs in Adobe Photoshop? Join us and learn how to export drawings or images from Photoshop layers and turn them into animated GIFs!
Follow these steps below:
rep your project:
1. Download practice files (adobe.ly/2mCX4MR). Or, create your own!
a. Use the practice files: Download the practice files which include 10 variations of a skull drawing.
b. Create your own: Use the Brush tool in Photoshop to create variations of a drawing on separate layers. Include detail to show changes in ""movement"" of each drawing.
2. Import drawing variations into one Photoshop document: Open all of the drawing files and make the first drawing (e.g., skull_Layer 1.jpg) the active document. Click the tab of the second open drawing file, Select All, Copy, make the first drawing file active, and Paste. Repeat for each drawing file. The document will have the same number of layers as drawing variations (e.g., ten layers for the skull animation).
Create your animation:
1. Open the Timeline panel, Window -- Timeline.
2. Click ""Create Frame Animation"" from the dropdown in the Timeline panel.
3. Choose ""Make Frames From Layers"" from the menu on the right of the Timeline panel.
4. Click the first animation from in the Timeline while holding Shift, and click on the last frame to select all frames in the timeline.
5. Click the down arrow in one frame and set the interval to 0.1 seconds.
6. Choose ""Forever"" from the drop down below the timeline to make the animation loop continuously.
7. Click ""Play"" to preview your animation.
8. Export your animated GIF: Choose File -- Export Save for Web (legacy). Choose GIF as the format from the top right side of the Save for Web dialog box. Make sure Looping Options is set to ""Forever"" on the bottom right, click Save, and choose a location.
That’s it! Happy creating!
Get more details on Adobe Photoshop here: adobe.com/products/photoshop.html
Subscribe to Adobe Creative Cloud: youtube.com/AdobeCreativeCloud?sub_confirmation…
Download Adobe Express: adobe.ly/3rDM7M8
Learn More: adobe.com/products/photoshop/explore.html?sdid=…
About Adobe Creative Cloud:
Adobe Creative Cloud gives you the world's best creative apps so you can turn your brightest ideas into your greatest work across your desktop and mobile devices.
Connect with Adobe Creative Cloud:
Twitter: twitter.com/creativecloud
LinkedIn: linkedin.com/showcase/adobe-creative-cloud/
Facebook: facebook.com/adobecreativecloud
Instagram: instagram.com/adobecreativecloud/
#AdobePhotoshop
How do I Create a GIF in Photoshop - Animate your Art! | Adobe Photoshop | Creative Cloud
youtube.com/watch?v=JYtZ2zsdE_somdfcGYEqPY
Follow these steps below:
rep your project:
1. Download practice files (adobe.ly/2mCX4MR). Or, create your own!
a. Use the practice files: Download the practice files which include 10 variations of a skull drawing.
b. Create your own: Use the Brush tool in Photoshop to create variations of a drawing on separate layers. Include detail to show changes in ""movement"" of each drawing.
2. Import drawing variations into one Photoshop document: Open all of the drawing files and make the first drawing (e.g., skull_Layer 1.jpg) the active document. Click the tab of the second open drawing file, Select All, Copy, make the first drawing file active, and Paste. Repeat for each drawing file. The document will have the same number of layers as drawing variations (e.g., ten layers for the skull animation).
Create your animation:
1. Open the Timeline panel, Window -- Timeline.
2. Click ""Create Frame Animation"" from the dropdown in the Timeline panel.
3. Choose ""Make Frames From Layers"" from the menu on the right of the Timeline panel.
4. Click the first animation from in the Timeline while holding Shift, and click on the last frame to select all frames in the timeline.
5. Click the down arrow in one frame and set the interval to 0.1 seconds.
6. Choose ""Forever"" from the drop down below the timeline to make the animation loop continuously.
7. Click ""Play"" to preview your animation.
8. Export your animated GIF: Choose File -- Export Save for Web (legacy). Choose GIF as the format from the top right side of the Save for Web dialog box. Make sure Looping Options is set to ""Forever"" on the bottom right, click Save, and choose a location.
That’s it! Happy creating!
Get more details on Adobe Photoshop here: adobe.com/products/photoshop.html
Subscribe to Adobe Creative Cloud: youtube.com/AdobeCreativeCloud?sub_confirmation…
Download Adobe Express: adobe.ly/3rDM7M8
Learn More: adobe.com/products/photoshop/explore.html?sdid=…
About Adobe Creative Cloud:
Adobe Creative Cloud gives you the world's best creative apps so you can turn your brightest ideas into your greatest work across your desktop and mobile devices.
Connect with Adobe Creative Cloud:
Twitter: twitter.com/creativecloud
LinkedIn: linkedin.com/showcase/adobe-creative-cloud/
Facebook: facebook.com/adobecreativecloud
Instagram: instagram.com/adobecreativecloud/
#AdobePhotoshop
How do I Create a GIF in Photoshop - Animate your Art! | Adobe Photoshop | Creative Cloud
youtube.com/watch?v=JYtZ2zsdE_somdfcGYEqPY
About this tutorial
Adobe Creative Cloud published this 1:00 video tutorial on October 28, 2017. It has been watched 4,864,117 times on YouTube.
- Channel
- Adobe Creative Cloud
- Category
- Howto & Style
- Duration
- 1:00
- Published
- October 28, 2017
- Views
- 4,864,117
- Likes
- 44,211
Tags
Share
This tutorial in other languages
- FRComment créer un GIF animé dans Photoshop | Adobe Creative Cloud
- ESCómo crear un GIF animado en Photoshop | Adobe Creative Cloud
- PTComo criar um GIF animado no Photoshop | Nuvem Criativa Adobe
- ITCome creare un GIF animato in Photoshop | Adobe Creative Cloud
- DEWie ein animiertes GIF in Photoshop erstellen | Adobe Creative Cloud
- NLHoe kan ik een GIF-animatie maken in Photoshop | Adobe Creative Cloud
- RUКак создать анимированный GIF в Photoshop | Adobe Creative Cloud
- PLJak utworzyć animowany GIF w Photoshopie | Adobe Creative Chmura
- JAPhotoshopでアニメーションGIFを作成する方法|アドビクリエイティブクラウド
- ARكيفية إنشاء GIF المتحركة في فوتوشوب | أدوبي سحابة الإبداعية
- HIकैसे Photoshop में एक एनिमेटेड GIF बनाने के लिए | एडोब क्रिएटिव क्लाउड
- IDCara Buat animasi GIF di Photoshop | Adobe Creative Cloud