Playback starts YouTube’s embedded player (privacy-enhanced mode).
How to manage user accounts in Windows 7
ChannelBest Video Tutorials and Help from HowTechDescription from the creator
This tutorial deals with the section of user management. From accessing administrator account in windows 7 to setting up new user accounts, this tutorial covers it all.
Don't forget to check out our site howtech.tv/ for more free how-to videos!
youtube.com/ithowtovids - our feed
facebook.com/howtechtv - join us on facebook
plus.google.com/103440382717658277879 - our group in Google+
Often enough when one a personal computer is being used by various users, one likes to operate different accounts for each person. This tutorial will guide you. Managing different user accounts in Windows 7 can be beneficial in many ways.
Step 1: Selecting "user accounts"
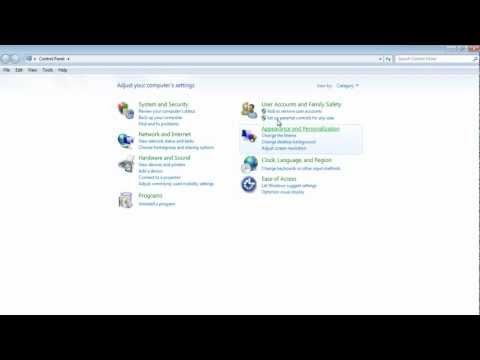
First of all, go to the start menu and open up the control panel. Now click open the "user accounts and family safety" section. Once you are there, click on the "User accounts" option.
Step 2: Managing another account
Over here you will be given a lot of choices relating to the different user accounts in Windows 7. You can change or remove the password currently set for the accounts, change the display picture, add or delete accounts, etc.
Step 3: Creating a new account
Select the "manage another account" option and a new window will appear in front of you. By default, you will only have one administrator account and one guest account. Click on the "Create a new account" option to make a new account.
Step 4: Finalizing creating the account
You can name the account and set it as a standard account or an administrator account. Once you have made the changes, you can click on the "create account" button given at the bottom.
Step 5: Turning off the guest account
If you want to turn off the guest account, select the "guest account" option and click on the "turn off the guest account" option on your left hand side.
Step 6: Deleting an account
Windows 7 offers various options when it comes to user management and handling of accounts is very easy. The account that we just created can be deleted as well. After selecting the newly created account, click on the "delete the account" option given on the left hand side of your screen.
Step 7: Deleting account files
In this window, you will be asked whether you want to delete the files that were saved in the account or keep them. We will choose the "delete files" option and delete all the files associated with the account as a result.
Don't forget to check out our site howtech.tv/ for more free how-to videos!
youtube.com/ithowtovids - our feed
facebook.com/howtechtv - join us on facebook
plus.google.com/103440382717658277879 - our group in Google+
Often enough when one a personal computer is being used by various users, one likes to operate different accounts for each person. This tutorial will guide you. Managing different user accounts in Windows 7 can be beneficial in many ways.
Step 1: Selecting "user accounts"
First of all, go to the start menu and open up the control panel. Now click open the "user accounts and family safety" section. Once you are there, click on the "User accounts" option.
Step 2: Managing another account
Over here you will be given a lot of choices relating to the different user accounts in Windows 7. You can change or remove the password currently set for the accounts, change the display picture, add or delete accounts, etc.
Step 3: Creating a new account
Select the "manage another account" option and a new window will appear in front of you. By default, you will only have one administrator account and one guest account. Click on the "Create a new account" option to make a new account.
Step 4: Finalizing creating the account
You can name the account and set it as a standard account or an administrator account. Once you have made the changes, you can click on the "create account" button given at the bottom.
Step 5: Turning off the guest account
If you want to turn off the guest account, select the "guest account" option and click on the "turn off the guest account" option on your left hand side.
Step 6: Deleting an account
Windows 7 offers various options when it comes to user management and handling of accounts is very easy. The account that we just created can be deleted as well. After selecting the newly created account, click on the "delete the account" option given on the left hand side of your screen.
Step 7: Deleting account files
In this window, you will be asked whether you want to delete the files that were saved in the account or keep them. We will choose the "delete files" option and delete all the files associated with the account as a result.
About this tutorial
Best Video Tutorials and Help from HowTech published this 1:31 video tutorial on November 2, 2012. It has been watched 9,806 times on YouTube.
- Category
- Howto & Style
- Duration
- 1:31
- Published
- November 2, 2012
- Views
- 9,806
- Likes
- 24
Share
This tutorial in other languages
- FRComment gérer les comptes utilisateur dans Windows 7
- ESCómo administrar cuentas de usuario en Windows 7
- PTComo gerenciar as contas de usuário no Windows 7
- ITCome gestire gli account utente in Windows 7
- DEWie man Benutzerkonten in Windows 7 verwalten
- NLHoe gebruikersaccounts beheren in Windows 7
- RUКак управлять учетными записями пользователей в Windows 7
- PLJak zarządzać kontami użytkowników w systemie Windows 7
- JAWindows 7でユーザーアカウントを管理する方法
- ARكيفية إدارة حسابات المستخدمين في ويندوز 7
- HIकैसे विंडोज 7 में उपयोगकर्ता खातों का प्रबंधन करने के लिए
- IDBagaimana mengelola account pengguna di Windows 7