Playback starts YouTube’s embedded player (privacy-enhanced mode).
How to password-protect documents in Microsoft Word 2010
ChannelBest Video Tutorials and Help from HowTechDescription from the creator
Want to protect your documents from being edited without permission? Follow this step by step tutorial and learn how to do so.
Don't forget to check out our site howtech.tv/ for more free how-to videos!
youtube.com/ithowtovids - our feed
facebook.com/howtechtv - join us on facebook
plus.google.com/103440382717658277879 - our group in Google+
Microsoft Word for windows is a comprehensive word processing program that allows one to edit text in a number of ways. It also ensures privacy and protection for information you don't wish to share. You can password protect word documents to save them from being edited or formatted and thus, this prevents loss or breach of data. It therefore secures documents by assigning a password to them.
In this tutorial, you will learn how to password-protect documents in Microsoft Word.
Step # 1 -- Using General Options
In Microsoft word for windows, go to the "File" tab and click on the 'Save as' option to open the "Save as" window. At the bottom of this window, you will see an option for 'Tools'. Click on its drop down arrow and then select the option titled 'General Options'. A dialogue box will now appear for the 'General options' and there are two fields that can be used to assign a password to the document. One of them is for the Password to open the file and the other is for the Password to allow modifications to the file. Since we want to protect the document from undergoing any changes or modification, we entered a password in the 'Password to modify' field. Now press the 'Protect Document' button to proceed further.
Step # 2 -- Restricting formatting and editing
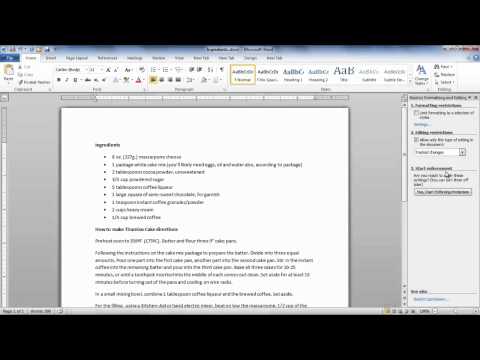
After you have clicked on the 'Protect Document' button, a 'Restrict editing and formatting' pane will open on the right hand side of the window. This consists of three options regarding restrictions. Jump to the second option which is titled 'Editing restrictions'. Since you are protecting the document against any kind of editing, you can choose what kind of editing is allowed in the document. Here, first you must put a check on the 'Allow only this type of editing in the document' option and then choose an option from the drop down arrow. Let's say you have selected the option titled 'Track changes'. Now, whenever any changes will be made, they will be marked as tracked changes.
Step # 3 -- Starting to enforce Protection
Once you have made the changes to the Editing restriction settings, the next step is to apply the protection. Click on the button located at the bottom of the restriction pane titled 'Yes, start enforcing Protection'. At this point, a small option box for the 'Start enforcing Protection' appears where you have to insert the password again. Re-enter the new password and click on the "OK" button to password protect word documents. Once you have done so, your document is completely protected. Anyone who wants to edit the document will be required to enter a password in order to do so.
Step # 4 -- Stopping Protection
To stop the protection for a particular document, you must simply click on the 'Stop Protection' button situated in the restriction panel at the extreme bottom. Click on this button and a small window will appear titled 'Unprotect Document' where you will have to enter the password again. Now click on the "OK" button and the document will be unprotected.
Don't forget to check out our site howtech.tv/ for more free how-to videos!
youtube.com/ithowtovids - our feed
facebook.com/howtechtv - join us on facebook
plus.google.com/103440382717658277879 - our group in Google+
Microsoft Word for windows is a comprehensive word processing program that allows one to edit text in a number of ways. It also ensures privacy and protection for information you don't wish to share. You can password protect word documents to save them from being edited or formatted and thus, this prevents loss or breach of data. It therefore secures documents by assigning a password to them.
In this tutorial, you will learn how to password-protect documents in Microsoft Word.
Step # 1 -- Using General Options
In Microsoft word for windows, go to the "File" tab and click on the 'Save as' option to open the "Save as" window. At the bottom of this window, you will see an option for 'Tools'. Click on its drop down arrow and then select the option titled 'General Options'. A dialogue box will now appear for the 'General options' and there are two fields that can be used to assign a password to the document. One of them is for the Password to open the file and the other is for the Password to allow modifications to the file. Since we want to protect the document from undergoing any changes or modification, we entered a password in the 'Password to modify' field. Now press the 'Protect Document' button to proceed further.
Step # 2 -- Restricting formatting and editing
After you have clicked on the 'Protect Document' button, a 'Restrict editing and formatting' pane will open on the right hand side of the window. This consists of three options regarding restrictions. Jump to the second option which is titled 'Editing restrictions'. Since you are protecting the document against any kind of editing, you can choose what kind of editing is allowed in the document. Here, first you must put a check on the 'Allow only this type of editing in the document' option and then choose an option from the drop down arrow. Let's say you have selected the option titled 'Track changes'. Now, whenever any changes will be made, they will be marked as tracked changes.
Step # 3 -- Starting to enforce Protection
Once you have made the changes to the Editing restriction settings, the next step is to apply the protection. Click on the button located at the bottom of the restriction pane titled 'Yes, start enforcing Protection'. At this point, a small option box for the 'Start enforcing Protection' appears where you have to insert the password again. Re-enter the new password and click on the "OK" button to password protect word documents. Once you have done so, your document is completely protected. Anyone who wants to edit the document will be required to enter a password in order to do so.
Step # 4 -- Stopping Protection
To stop the protection for a particular document, you must simply click on the 'Stop Protection' button situated in the restriction panel at the extreme bottom. Click on this button and a small window will appear titled 'Unprotect Document' where you will have to enter the password again. Now click on the "OK" button and the document will be unprotected.
About this tutorial
Best Video Tutorials and Help from HowTech published this 1:27 video tutorial on November 5, 2012. It has been watched 179,128 times on YouTube.
- Category
- Howto & Style
- Duration
- 1:27
- Published
- November 5, 2012
- Views
- 179,128
- Likes
- 652
Share
This tutorial in other languages
- FRComment les documents de mot de passe dans Microsoft Word protect 2010
- ESCómo proteger con contraseña los documentos en Microsoft Word 2010
- PTComo documentos protegidas por senha no Microsoft Word 2010
- ITCome proteggere con password i documenti in Microsoft Word 2010
- DEWie man Kennwort schützen Dokumente in Microsoft Word 2010
- NLHoe kan ik een wachtwoord beveiligen van documenten in Microsoft Word 2010
- RUКак защитить паролем документов в Microsoft Word 2010
- PLJak zabezpieczyć hasłem dokumentów w programie Microsoft Word 2010
- JAどのようにMicrosoft Wordの2010年にはパスワードで保護するドキュメントへ
- ARكيفية الوثائق حماية كلمة السر في Microsoft Word 2010
- HIकैसे माइक्रोसॉफ्ट वर्ड 2010 में पासवर्ड-सुरक्षित दस्तावेजों को
- IDCara dokumen sandi-melindungi di Microsoft Word 2010