Playback starts YouTube’s embedded player (privacy-enhanced mode).
How to Show File Extensions in Windows 7 in Registry Editor
ChannelHOWTECHDescription from the creator
Follow the step by step guide below and learn the different ways in which you can show file extensions in windows.
Don't forget to check out our site howtech.tv/ for more free how-to videos!
youtube.com/ithowtovids - our feed
facebook.com/howtechtv - join us on facebook
plus.google.com/103440382717658277879 - our group in Google+
File extensions are unique patterns of alphanumeric characters which are present at the very end of every file name. These unique patterns basically determine which program should be used to open up the file. In windows 7, by default the file extensions are not displayed. You can configure and personalize the operating system quite easily.
You can show file extensions in two ways. The first method is by using the Registry Editor and the second is via Folder Options.
Follow the step by step guide below and learn how to show file extensions in windows 7.
Step 1 -- Opening up the run commnad
First of all, press the "windows + R" key to open up the Run command. With that done, type in "regedit" and hit enter to open up the Registry Editor.
Step 2 -- Accessing the directory
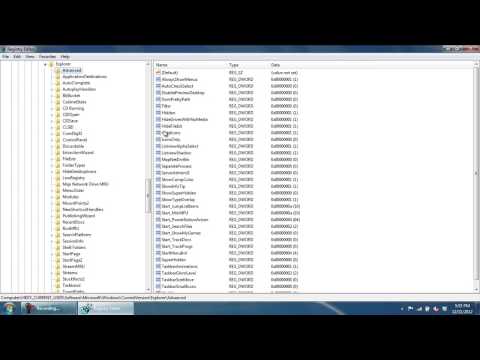
Under the HKEY_CURRENT_USER directory, move the cursor to Software, locate Microsoft and open up the Windows directory. From there, access the CurrentVersion directory, move over to Explorer and enter the Advanced directory.
In the pane, towards the right side of the window, double click on "HideFileExt" to modify it.
Step 3 -- Setting the values
In the "Value data:" field, replace 1 with 0 and click on "Ok". Using this method you will be able to show file extensions within the windows operating system. With that done, close the registry editor and refresh windows explorer by pressing F5 on your keyboard.
Step 4 -- Alternate Method
Another way to show file extension in windows 7 is via folder options. For this, you would have to access the control panel first. For that press that "windows + R" key to open up the Run command. Over here, type in "control" to open up the Control Panel.
Step 5 -- Opening up the folder options
Once the "Control Panel" window opens up, click on "Folder Options".
Step 6 -- Changing default settings
With that done, move over to the "View" tab and uncheck the "Hide extensions for known file types" option. Now click on "Ok" and that's it. With that done, the windows operating system will automatically show file extensions within the directories.
Don't forget to check out our site howtech.tv/ for more free how-to videos!
youtube.com/ithowtovids - our feed
facebook.com/howtechtv - join us on facebook
plus.google.com/103440382717658277879 - our group in Google+
File extensions are unique patterns of alphanumeric characters which are present at the very end of every file name. These unique patterns basically determine which program should be used to open up the file. In windows 7, by default the file extensions are not displayed. You can configure and personalize the operating system quite easily.
You can show file extensions in two ways. The first method is by using the Registry Editor and the second is via Folder Options.
Follow the step by step guide below and learn how to show file extensions in windows 7.
Step 1 -- Opening up the run commnad
First of all, press the "windows + R" key to open up the Run command. With that done, type in "regedit" and hit enter to open up the Registry Editor.
Step 2 -- Accessing the directory
Under the HKEY_CURRENT_USER directory, move the cursor to Software, locate Microsoft and open up the Windows directory. From there, access the CurrentVersion directory, move over to Explorer and enter the Advanced directory.
In the pane, towards the right side of the window, double click on "HideFileExt" to modify it.
Step 3 -- Setting the values
In the "Value data:" field, replace 1 with 0 and click on "Ok". Using this method you will be able to show file extensions within the windows operating system. With that done, close the registry editor and refresh windows explorer by pressing F5 on your keyboard.
Step 4 -- Alternate Method
Another way to show file extension in windows 7 is via folder options. For this, you would have to access the control panel first. For that press that "windows + R" key to open up the Run command. Over here, type in "control" to open up the Control Panel.
Step 5 -- Opening up the folder options
Once the "Control Panel" window opens up, click on "Folder Options".
Step 6 -- Changing default settings
With that done, move over to the "View" tab and uncheck the "Hide extensions for known file types" option. Now click on "Ok" and that's it. With that done, the windows operating system will automatically show file extensions within the directories.
About this tutorial
HOWTECH published this 1:24 video tutorial on October 28, 2013. It has been watched 9,116 times on YouTube.
- Channel
- HOWTECH
- Category
- Howto & Style
- Duration
- 1:24
- Published
- October 28, 2013
- Views
- 9,116
- Likes
- 24
Share
This tutorial in other languages
- FRComment afficher les extensions de fichier dans Windows 7 dans l'Éditeur du Registre
- ESCómo mostrar las extensiones de archivo de Windows 7 en el Editor del Registro
- PTComo mostrar extensões de arquivo no Windows 7 no Editor do Registro
- ITCome visualizzare le estensioni dei file in Windows 7 in Editor del Registro
- DEWie Dateierweiterungen in Windows 7 in der Registrierungs-Editor zeigen
- NLHoe te File Extensions in Windows 7 in de Register-editor tonen
- RUКак показать расширение файлов в Windows 7 в редакторе реестра
- PLJak pokazać rozszerzeń plików w systemie Windows 7 w Edytorze rejestru
- JAレジストリエディタで、Windows 7でのファイル拡張子を表示する方法
- ARكيفية إظهار ملحقات الملفات في ويندوز 7 في محرر التسجيل
- HIरजिस्ट्री संपादक में विंडोज 7 में फ़ाइल एक्सटेंशन दिखाने के लिए कैसे
- IDCara Tampilkan File Extensions pada Windows 7 di Registry Editor