Playback starts YouTube’s embedded player (privacy-enhanced mode).
How to Track Changes in Word
ChannelExcel, Word and PowerPoint Tutorials from HowtechDescription from the creator
Follow this step by step guide to learn how to change the tracking options. Learn how to use the track changes feature in Ms Word.
Don't forget to check out our site howtech.tv/ for more free how-to videos!
youtube.com/ithowtovids - our feed
facebook.com/howtechtv - join us on facebook
plus.google.com/103440382717658277879 - our group in Google+
In this tutorial, we will teach you how to track changes in Word. The track changes option in Word allows you to mark all the changes that are made to the document. When reviewing and making corrections to a particular document, track changes can be used to tell the original writer the mistakes he might have made.
Step 1 -- Adjust tracking options
Follow this step by step guide to learn how to track changes in Word.
First of all, you need to have the word document opened in which you want to use the track changes option. Now go to the review tab and click on the "track changes" drop down button. From the menu, select change tracking options.
Step 2 -- Change markup actions and colors
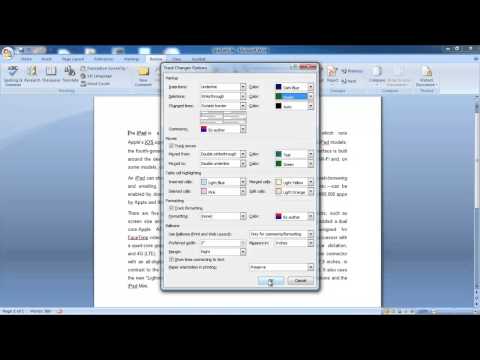
In the track changes options window, you can change the markup colors for insertion and deletion as per your requirements. You can always change the markup action as well. For the purpose of this tutorial, we will underline all the insertions in blue while all the deletions will be strikethrough and bear the color green. Once you have made the changes, click on the ok button in order to apply them.
Step 3 -- Track Changes
Now go back to the tracking section and click on the track changes button in order to track changes made to the document. We will delete a line and you will notice that it will be strikethrough and green in color just as we specified. The lines you will add to the document will also be marked under the settings you specified for insertion.
Step 4 -- Accept or Reject track changes
In order to apply a change, you will have to select it and then click on the accept button available on the top. Select another change and click on the reject button and you will see that the change will be ignored.
In this manner, you can track changes in Word.
Don't forget to check out our site howtech.tv/ for more free how-to videos!
youtube.com/ithowtovids - our feed
facebook.com/howtechtv - join us on facebook
plus.google.com/103440382717658277879 - our group in Google+
In this tutorial, we will teach you how to track changes in Word. The track changes option in Word allows you to mark all the changes that are made to the document. When reviewing and making corrections to a particular document, track changes can be used to tell the original writer the mistakes he might have made.
Step 1 -- Adjust tracking options
Follow this step by step guide to learn how to track changes in Word.
First of all, you need to have the word document opened in which you want to use the track changes option. Now go to the review tab and click on the "track changes" drop down button. From the menu, select change tracking options.
Step 2 -- Change markup actions and colors
In the track changes options window, you can change the markup colors for insertion and deletion as per your requirements. You can always change the markup action as well. For the purpose of this tutorial, we will underline all the insertions in blue while all the deletions will be strikethrough and bear the color green. Once you have made the changes, click on the ok button in order to apply them.
Step 3 -- Track Changes
Now go back to the tracking section and click on the track changes button in order to track changes made to the document. We will delete a line and you will notice that it will be strikethrough and green in color just as we specified. The lines you will add to the document will also be marked under the settings you specified for insertion.
Step 4 -- Accept or Reject track changes
In order to apply a change, you will have to select it and then click on the accept button available on the top. Select another change and click on the reject button and you will see that the change will be ignored.
In this manner, you can track changes in Word.
About this tutorial
Excel, Word and PowerPoint Tutorials from Howtech published this 1:09 video tutorial on November 8, 2013. It has been watched 20,778 times on YouTube.
- Category
- Howto & Style
- Duration
- 1:09
- Published
- November 8, 2013
- Views
- 20,778
- Likes
- 24
Tags
Share
This tutorial in other languages
- FRComment le suivi des modifications dans Word
- ESCómo cambios en Word
- PTComo Controlar alterações no Word
- ITCome Revisioni in Word
- DEWie man Änderungen verfolgen in Word
- NLHoe te Wijzigingen bijhouden in Word
- RUКак отслеживать изменения в Слове
- PLJak śledzenie zmian w programie Word
- JAどのようにWordで変更履歴の記録へ
- ARكيفية تعقب التغييرات في Word
- HIकैसे वर्ड में परिवर्तन ट्रैक करने के लिए
- IDCara Melacak Perubahan di Word