Playback starts YouTube’s embedded player (privacy-enhanced mode).
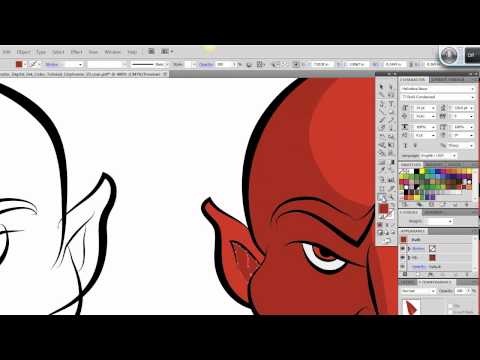
Ultimate Inking and Coloring Tutorial for Adobe Illustrator (short version)
ChannelClay ButlerDescription from the creator
The Fastest, Easiest Method to Ink and Color in Adobe Illustrator.
Please read the video description below before posting questions.
Like my tutorials? Why not donate a buck or two! paypal.com/cgi-bin/webscr?cmd=_s-xclick&hos…
See the tutorial on my blog: claytowne.com/beats-digging-ditches/ultimate-di…
Or download the companion Illustrator editable PDF file: claytowne.com/beats-digging-ditches/pdf/Simple_…
The brush I used is embedded in the file.
The brush I used is this Hair Brush by ChewedKandi. You'll need a DeviantArt account to download it. Download here: chewedkandi.deviantart.com/art/Hair-and-line-ar…
Screenshot of brush settings used screencast.com/t/cVCuDIlyyUh
About Those "Lines" You See When You Use this Method:
If you are referring to the microscopic lines where they intersect, or where you cut with the knife, that's an illusion. Zoom in to 6400%. They never get bigger. They don't print that way either. I've been using this technique for years and my stuff has always printed perfectly on posters, trade show pop ups, t-shirts, postcards - everything really - without issues. If they really bother you Try Export/Tiff. That gives a clean export. So will Save For Web/PNG ( Art Optimized -Supersampling) or JPG. In the Web save box you can change the pixel dimensions to any size you want so you can save some pretty huge, print quality images.
Tech Specs for people who are into this stuff:
I use a Wacom Intuos 4 medium size tablet for all drawing. If you are a serious artist you MUST have a tablet. At the very least get a Wacom Bamboo. They're like $50. I'm running a custom rig that I built myself back in 2009. It's a Windows 7 64 bit box with a Asus P6T Deluxe V2 motherboard. It's got 12 GB Corsair DDR3 RAM, a Pentium i7 920 CPU, a Nvida GeForce GTX 280 graphic card, six WD Caviar Black 1TB drives in a RAID 1 configuration. My OS and programs are on one RAID array, and the other two RAID arrays hold my files. I also have two RAID 1 external drives for additional backups. Rounding out the system is a Corsair XT 750 power supply, two 1000 watt UPS backups, a USB 3 PCI Express card, an eSATA PCI express card (I ran out of SATA ports with so many hard drives) a HD Pro Logitec webcam and a pair of DVD burners.
There are a lot of excellent ink and color tutorials on the web, so what is different about this tutorial?
1. Real time. Unlike those speed drawing tutorials that blow your mind but teach you nothing, this one is a true speed drawing tutorial as it's in real time. No cuts and no sped up sections to hide the true time it takes.
2. Learn a practical but unorthodox technique for speeding up your inking and coloring in Illustrator.
3. Vector. In the print industry vector rules the roost so those Photoshop inking tutorials aren't very helpful for someone who's primary concern is clean reproduction in all mediums including brochures, t-shirts, posters, trade show booths, video and packaging.
This method is not the most sophisticated but it gets the job done quick and it looks great. I also discovered one of its key components by accident.
It's great for poster art, cartoon characters, comic book art or any place you need a classic ink and color look - and need it fast
Please read the video description below before posting questions.
Like my tutorials? Why not donate a buck or two! paypal.com/cgi-bin/webscr?cmd=_s-xclick&hos…
See the tutorial on my blog: claytowne.com/beats-digging-ditches/ultimate-di…
Or download the companion Illustrator editable PDF file: claytowne.com/beats-digging-ditches/pdf/Simple_…
The brush I used is embedded in the file.
The brush I used is this Hair Brush by ChewedKandi. You'll need a DeviantArt account to download it. Download here: chewedkandi.deviantart.com/art/Hair-and-line-ar…
Screenshot of brush settings used screencast.com/t/cVCuDIlyyUh
About Those "Lines" You See When You Use this Method:
If you are referring to the microscopic lines where they intersect, or where you cut with the knife, that's an illusion. Zoom in to 6400%. They never get bigger. They don't print that way either. I've been using this technique for years and my stuff has always printed perfectly on posters, trade show pop ups, t-shirts, postcards - everything really - without issues. If they really bother you Try Export/Tiff. That gives a clean export. So will Save For Web/PNG ( Art Optimized -Supersampling) or JPG. In the Web save box you can change the pixel dimensions to any size you want so you can save some pretty huge, print quality images.
Tech Specs for people who are into this stuff:
I use a Wacom Intuos 4 medium size tablet for all drawing. If you are a serious artist you MUST have a tablet. At the very least get a Wacom Bamboo. They're like $50. I'm running a custom rig that I built myself back in 2009. It's a Windows 7 64 bit box with a Asus P6T Deluxe V2 motherboard. It's got 12 GB Corsair DDR3 RAM, a Pentium i7 920 CPU, a Nvida GeForce GTX 280 graphic card, six WD Caviar Black 1TB drives in a RAID 1 configuration. My OS and programs are on one RAID array, and the other two RAID arrays hold my files. I also have two RAID 1 external drives for additional backups. Rounding out the system is a Corsair XT 750 power supply, two 1000 watt UPS backups, a USB 3 PCI Express card, an eSATA PCI express card (I ran out of SATA ports with so many hard drives) a HD Pro Logitec webcam and a pair of DVD burners.
There are a lot of excellent ink and color tutorials on the web, so what is different about this tutorial?
1. Real time. Unlike those speed drawing tutorials that blow your mind but teach you nothing, this one is a true speed drawing tutorial as it's in real time. No cuts and no sped up sections to hide the true time it takes.
2. Learn a practical but unorthodox technique for speeding up your inking and coloring in Illustrator.
3. Vector. In the print industry vector rules the roost so those Photoshop inking tutorials aren't very helpful for someone who's primary concern is clean reproduction in all mediums including brochures, t-shirts, posters, trade show booths, video and packaging.
This method is not the most sophisticated but it gets the job done quick and it looks great. I also discovered one of its key components by accident.
It's great for poster art, cartoon characters, comic book art or any place you need a classic ink and color look - and need it fast
About this tutorial
Clay Butler published this 8:51 video tutorial on November 1, 2012. It has been watched 1,451,597 times on YouTube.
- Channel
- Clay Butler
- Category
- Howto & Style
- Duration
- 8:51
- Published
- November 1, 2012
- Views
- 1,451,597
- Likes
- 18,016
Tags
Share
This tutorial in other languages
- FRUltime Encrage et Tutorial coloriage pour Adobe Illustrator (version courte)
- ESÚltima entintado y colorear Tutorial para Adobe Illustrator (versión corta)
- PTFinal de tintagem e Coloring Tutorial para o Adobe Illustrator (versão curta)
- ITUltimo inchiostrazione e la colorazione tutorial per Adobe Illustrator (versione corta)
- DEUltimative Einfärben und Coloring Tutorial für Adobe Illustrator (Kurzfassung)
- NLUltimate Inking en Coloring Tutorial voor Adobe Illustrator (korte versie)
- RUОкончательный Inking и раскраски Учебник для Adobe Illustrator (короткая версия)
- PLOstatecznym Inking i farbowanie Tutorial dla Adobe Illustrator (wersja krótka)
- JAAdobe Illustratorのための究極のインキングおよび着色チュートリアル(ショートバージョン)
- ARفي نهاية المطاف التحبير والتلوين تعليمي لأدوبي المصور (مقطعة)
- HIअंतिम भनक और रंग ट्यूटोरियल एडोब इलस्ट्रेटर के लिए (लघु संस्करण)
- IDUltimate tinta dan Mewarnai Tutorial Adobe Illustrator (versi pendek)