Playback starts YouTube’s embedded player (privacy-enhanced mode).
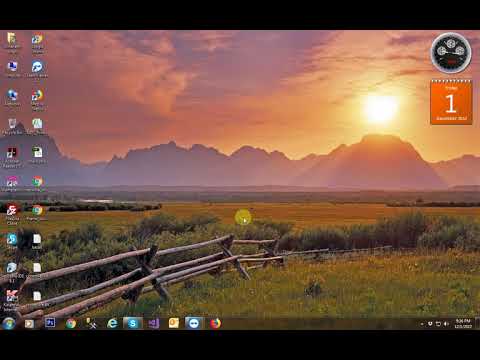
How to add clock and calendar on desktop
ChannelDinanath SinghDescription from the creator
Personalize your Windows 7 desktop with gadgets, such as a digital calendar and clock. These programs also display updates to help you plan your activities. Viewing your gadgets on the Windows desktop avoids having to open new windows to check the date and time, or squint to view the small clock in the corner of the taskbar. You can even set and label additional clocks, which helps you work with clients based in other time zones.
Clock
1. Right-click the desktop to open a list of options. (See Reference 2.)
2. Click “Gadgets” to open the thumbnail gallery of gadgets.
3. Double-click the “Clock” icon in the gallery to open a clock to your desktop.
4. Mouse over the clock to display the tools pane (or right-click it to view more options). Click the “wrench” options button to open the Clock dialog box.
5. Click the arrow button to cycle through the clock styles to find your preferred style. Type a name in the Clock Name field if you wish to label your clock.
6. Click the arrow in the Time Zone field to display the list and then click the preferred time zone (for example, Current Computer Time or a UTC location). Click the “Show the second hand” button to add a tick to the check box, if preferred.
7. Click the “OK” button to close the Clock dialog box.
facebook : facebook.com/dinanathsingh/
youtube : youtube.com/user/Dinanath129
Google plus : plus.google.com/u/0/111551527476226696321
twitter : twitter.com/Dinanath33
linkedin : linkedin.com/in/dinanath-singh-62145237/
Clock
1. Right-click the desktop to open a list of options. (See Reference 2.)
2. Click “Gadgets” to open the thumbnail gallery of gadgets.
3. Double-click the “Clock” icon in the gallery to open a clock to your desktop.
4. Mouse over the clock to display the tools pane (or right-click it to view more options). Click the “wrench” options button to open the Clock dialog box.
5. Click the arrow button to cycle through the clock styles to find your preferred style. Type a name in the Clock Name field if you wish to label your clock.
6. Click the arrow in the Time Zone field to display the list and then click the preferred time zone (for example, Current Computer Time or a UTC location). Click the “Show the second hand” button to add a tick to the check box, if preferred.
7. Click the “OK” button to close the Clock dialog box.
facebook : facebook.com/dinanathsingh/
youtube : youtube.com/user/Dinanath129
Google plus : plus.google.com/u/0/111551527476226696321
twitter : twitter.com/Dinanath33
linkedin : linkedin.com/in/dinanath-singh-62145237/
About this tutorial
Dinanath Singh published this 2:57 video tutorial on November 12, 2018. It has been watched 45,897 times on YouTube.
- Channel
- Dinanath Singh
- Category
- Science & Technology
- Duration
- 2:57
- Published
- November 12, 2018
- Views
- 45,897
- Likes
- 51
Tags
Share
This tutorial in other languages
- FRComment ajouter horloge et calendrier sur le bureau
- ESCómo agregar reloj y el calendario en el escritorio
- PTComo adicionar relógio e calendário no desktop
- ITCome aggiungere orologio e calendario sul desktop
- DEWie Uhr hinzufügen und Kalender auf dem Desktop
- NLHoe om de klok toevoegen en kalender op de desktop
- RUКак добавить часы и календарь на рабочем столе
- PLJak dodać zegar i kalendarz na pulpicie
- JAデスクトップ上に時計やカレンダーを追加する方法
- ARكيفية إضافة مدار الساعة والتقويم على سطح المكتب
- HIघड़ी जोड़ सकते हैं और डेस्कटॉप पर कैलेंडर कैसे
- IDCara menambahkan jam dan kalender pada desktop