Playback starts YouTube’s embedded player (privacy-enhanced mode).
How to Change Screen Resolution in Windows 10 - Using NVIDIA Control Panel
ChannelPalla SridharDescription from the creator
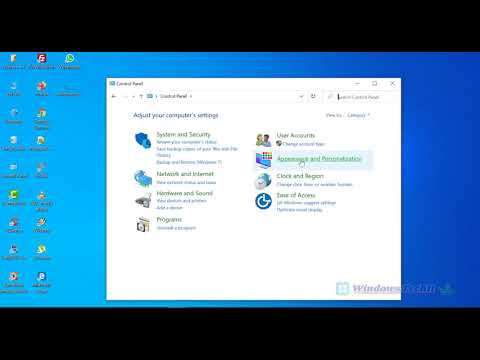
The following steps will show how to change screen resolution in Windows 10 using control panel.
1. Press the Win key and type few letters of "Control Panel".
2. In the Start Menu list, click the "Control Panel".
Tip: Otherwise, you click Win key to open Start Menu and Windows System - Control Panel.
3. Appearance - Display - Screen Resolution.
4. Your display device (like monitor model etc) will be listed.
5. Below that select the desired screen resolution.
6. Then click on "Apply".
If you are using graphics card like NVIDIA, the following steps will help.
1. Open the Control Panel.
2. View by "Small icons".
3. Click on "NVIDIA Control Panel".
4. In the pop-up window, select "Change resolution" under Display.
5. If you have multiple monitors, select the right monitor.
6. Then under "Apply the following settings", select the screen resolution.
1. Press the Win key and type few letters of "Control Panel".
2. In the Start Menu list, click the "Control Panel".
Tip: Otherwise, you click Win key to open Start Menu and Windows System - Control Panel.
3. Appearance - Display - Screen Resolution.
4. Your display device (like monitor model etc) will be listed.
5. Below that select the desired screen resolution.
6. Then click on "Apply".
If you are using graphics card like NVIDIA, the following steps will help.
1. Open the Control Panel.
2. View by "Small icons".
3. Click on "NVIDIA Control Panel".
4. In the pop-up window, select "Change resolution" under Display.
5. If you have multiple monitors, select the right monitor.
6. Then under "Apply the following settings", select the screen resolution.
About this tutorial
Palla Sridhar published this 3:37 video tutorial on March 10, 2020. It has been watched 27,597 times on YouTube.
- Channel
- Palla Sridhar
- Category
- Science & Technology
- Duration
- 3:37
- Published
- March 10, 2020
- Views
- 27,597
Tags
Share
This tutorial in other languages
- FRComment changer la résolution d'écran dans Windows 10 - Utilisation de NVIDIA Panneau de configuration
- ESCómo cambiar la resolución de pantalla en Windows 10 - Uso del panel de control de NVIDIA
- PTComo mudar a resolução de tela no Windows 10 - Usando o Painel de Controle NVIDIA
- ITCome cambiare la risoluzione dello schermo in Windows 10 - Uso di NVIDIA Control Panel
- DEWie Ändern der Bildschirmauflösung in 10 Fenster - Mit NVIDIA Control Panel
- NLHoe te veranderen schermresolutie in Windows 10 - Met behulp van NVIDIA Control Panel
- RUКак изменить разрешение экрана в Windows 10 - Использование Панели управления NVIDIA
- PLJak zmienić rozdzielczość ekranu w systemie Windows 10 - Korzystanie z Panel sterowania NVIDIA
- JAWindowsの10での方法を変更する画面解像度 - NVIDIAコントロールパネルを使用して
- ARكيفية تغيير دقة الشاشة في ويندوز 10 - عن طريق لوحة تحكم NVIDIA
- HIकैसे Windows 10 में बदलें स्क्रीन संकल्प के लिए - NVIDIA नियंत्रण कक्ष का उपयोग करना
- IDCara Mengubah Resolusi Layar pada Windows 10 - Menggunakan NVIDIA Control Panel