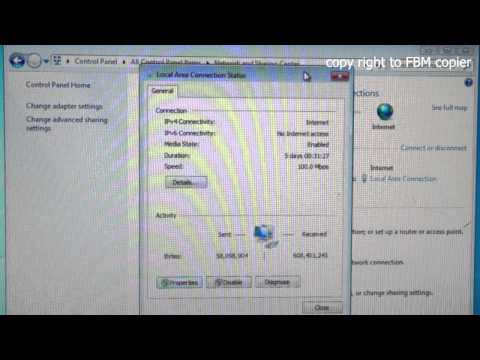
Playback starts YouTube’s embedded player (privacy-enhanced mode).
How to convert Dynamic IP Address to Static IP Address
ChannelCOPIERDescription from the creator
===To view written instruction click "show more" down below===
This video covers the steps to convert your dynamic IP address to Static IP.
This step is required to setup FTP Scan from either Xerox or Canon.
Please follow the step by step instructions below.
1. Click "Start"
2. Select "Control Panel"
3. Select "Network and Sharing Center"
4. Click "Local Area Connection" if the computer is connected directly with ethernet cable or Click "Wifi" if you are connect wirelessly.
5. Click "Properties"
6. Select "Details" and please make a note of (IP Address, Subnet Mask, Default Gateway, and DNS Server)
7. After you have made the notes click "Close"
8. Click "Properties"
9. Highlight "Internet Protocol Version 4 (TCP/IPv4)
10. Select "Use the following IP Address" and fill in the following fields(IP address, Subnet mask, Default Gateway, and Preferred DNS server) these are the information that you made a note of.
11. Click "Ok" and "Close" and "Close"
Now the IP address on your computer is fixed meaning the router won't change the address unless changed manually. The copier and the computer will be able to communicate using the FTP Utility when scanning documents.
This video covers the steps to convert your dynamic IP address to Static IP.
This step is required to setup FTP Scan from either Xerox or Canon.
Please follow the step by step instructions below.
1. Click "Start"
2. Select "Control Panel"
3. Select "Network and Sharing Center"
4. Click "Local Area Connection" if the computer is connected directly with ethernet cable or Click "Wifi" if you are connect wirelessly.
5. Click "Properties"
6. Select "Details" and please make a note of (IP Address, Subnet Mask, Default Gateway, and DNS Server)
7. After you have made the notes click "Close"
8. Click "Properties"
9. Highlight "Internet Protocol Version 4 (TCP/IPv4)
10. Select "Use the following IP Address" and fill in the following fields(IP address, Subnet mask, Default Gateway, and Preferred DNS server) these are the information that you made a note of.
11. Click "Ok" and "Close" and "Close"
Now the IP address on your computer is fixed meaning the router won't change the address unless changed manually. The copier and the computer will be able to communicate using the FTP Utility when scanning documents.
About this tutorial
COPIER published this 2:15 video tutorial on November 2, 2013. It has been watched 133,995 times on YouTube.
- Channel
- COPIER
- Category
- Science & Technology
- Duration
- 2:15
- Published
- November 2, 2013
- Views
- 133,995
- Likes
- 356
Share
This tutorial in other languages
- FRComment convertir une adresse IP dynamique à Adresse IP statique
- ESCómo convertir una dirección IP dinámica a la dirección IP estática
- PTComo converter endereço IP dinâmico para Endereço IP estático
- ITCome convertire Indirizzo IP dinamico per indirizzo IP statico
- DEWie erfolgt die dynamische IP-Adresse Statische IP-Adresse umwandeln
- NLHoe om dynamische IP-adres om te zetten in statisch IP-adres
- RUКак преобразовать динамический IP-адрес для статического IP-адреса
- PLJak przekonwertować dynamiczny adres IP na statyczny adres IP
- JA静的IPアドレスを動的IPアドレスを変換する方法
- ARكيفية تحويل عنوان IP الديناميكي إلى عنوان IP ثابت
- HIकैसे स्थिर IP पता करने के लिए गतिशील आईपी पता परिवर्तित करने के लिए
- IDBagaimana mengkonversi Dynamic IP Address ke Static IP Address