Playback starts YouTube’s embedded player (privacy-enhanced mode).
How to Make a Rain Gauge
ChannelHowcastDescription from the creator
Full Playlist: youtube.com/playlist?list=PLLALQuK1NDrhmmfheHCL…
-
-
Watch more How to Do Fun Tech & Science Projects videos: howcast.com/videos/424470-How-to-Make-a-Rain-Ga…
How much rain did that big storm drop? Make your own rain gauge and you'll always know the answer to this important weather question.
Step 1: Attach ruler
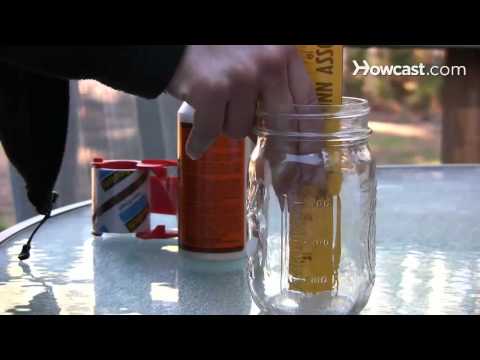
Attach a ruler to the inside of the glass jar using clear, waterproof tape. Make sure the ruler touches the jar bottom.
Tip
Break the ruler in half to better fit inside the jar.
Step 2: Glue to wood
Glue the jar to a block of wood to create stability in strong winds. Make sure the wood block is heavy enough to stand up to tumultuous weather.
Step 3: Place in open area
Place the jar in an open area when the weather forecast calls for precipitation.
Tip
Avoid placing the rain gauge beneath trees, next to your home, or other structures.
Step 4: Measure the rainfall
Measure the rainfall as soon as possible after a rain to avoid loss from evaporation. Calculate the measurement to the nearest tenth of an inch.
Step 5: Record rainfall
Record rainfall measurements from your rain gauge for a period of months to track precipitation and compare months and seasons. Now, use your data to your advantage and plan the best time for your favorite outdoor activities.
Did You Know?
As of 2008, Las Vegas was the driest major U.S. city, receiving 4.49 inches of rain annually.
-
-
Watch more How to Do Fun Tech & Science Projects videos: howcast.com/videos/424470-How-to-Make-a-Rain-Ga…
How much rain did that big storm drop? Make your own rain gauge and you'll always know the answer to this important weather question.
Step 1: Attach ruler
Attach a ruler to the inside of the glass jar using clear, waterproof tape. Make sure the ruler touches the jar bottom.
Tip
Break the ruler in half to better fit inside the jar.
Step 2: Glue to wood
Glue the jar to a block of wood to create stability in strong winds. Make sure the wood block is heavy enough to stand up to tumultuous weather.
Step 3: Place in open area
Place the jar in an open area when the weather forecast calls for precipitation.
Tip
Avoid placing the rain gauge beneath trees, next to your home, or other structures.
Step 4: Measure the rainfall
Measure the rainfall as soon as possible after a rain to avoid loss from evaporation. Calculate the measurement to the nearest tenth of an inch.
Step 5: Record rainfall
Record rainfall measurements from your rain gauge for a period of months to track precipitation and compare months and seasons. Now, use your data to your advantage and plan the best time for your favorite outdoor activities.
Did You Know?
As of 2008, Las Vegas was the driest major U.S. city, receiving 4.49 inches of rain annually.
About this tutorial
Howcast published this 1:29 video tutorial on November 1, 2011. It has been watched 184,933 times on YouTube.
- Channel
- Howcast
- Category
- Science & Technology
- Duration
- 1:29
- Published
- November 1, 2011
- Views
- 184,933
- Likes
- 430
Tags
Share
This tutorial in other languages
- FRComment faire un pluviomètre
- ESCómo hacer un pluviómetro
- PTComo fazer um pluviômetro
- ITCome fare un pluviometro
- DEWie ein Regen Gauge Stellen
- NLHoe maak je een Rain Gauge maken
- RUКак сделать дождемер
- PLJak zrobić deszczomierz
- JA雨量計を作る方法
- ARكيف اصنع مقياس المطر
- HIएक बारिश गेज बनाने के लिए कैसे
- IDCara Membuat Gauge Rain