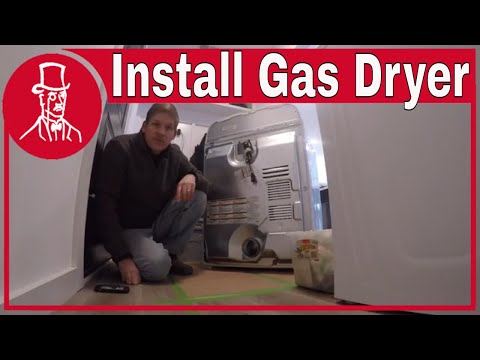
Playback starts YouTube’s embedded player (privacy-enhanced mode).
How to Install a Whirlpool Gas Dryer
ChannelHouseBaronsDescription from the creator
Installing a gas dryer requires connecting a flexible gas supply line, venting to the exterior, and verifying the gas connection with soapy water. It's a 30-minute DIY job — here's the full walkthrough.
📋 Free Home Maintenance Checklist → the-struggle-bus.beehiiv.com
WHAT YOU NEED:
→ 48" flexible gas connector hose (usually sold separately)
→ Duct connector for 4" dryer vent
→ Adjustable wrench
→ Pipe thread compound or Teflon tape (gas-rated)
INSTALLATION STEPS:
1. Slide the dryer into position — leave 1–4 inches from the wall for vent clearance
2. Connect the flexible gas connector to the dryer's gas inlet and to the shut-off valve
3. Tighten both connections hand-tight plus 1/4 turn with a wrench
4. Connect the 4" vent duct to the dryer exhaust port
5. Test for gas leaks: apply soapy water to all connections — bubbles indicate a leak
6. Plug in the 120V power cord (gas dryers use standard outlets, not 240V)
PRO TIP: Never use white Teflon tape on gas lines — use yellow gas-rated Teflon tape or pipe thread compound rated for gas.
→ Gorilla tape — when regular tape just doesn't cut it: amzn.to/3kmyKhS
→ 142 tools in one box — the kit that handles everything: amzn.to/3ZD1UJV
→ The little brush that reaches places nothing else can: amzn.to/3YfjIsA
More tools we use and love:
Subscribe for weekly DIY home repair: youtube.com/@Housebarons
As an Amazon Associate I earn from qualifying purchases. This helps support the channel at no extra cost to you.
#GasDryer #WhirlpoolDryer #DryerInstall #LaundryDIY #ApplianceInstall
📋 Free Home Maintenance Checklist → the-struggle-bus.beehiiv.com
WHAT YOU NEED:
→ 48" flexible gas connector hose (usually sold separately)
→ Duct connector for 4" dryer vent
→ Adjustable wrench
→ Pipe thread compound or Teflon tape (gas-rated)
INSTALLATION STEPS:
1. Slide the dryer into position — leave 1–4 inches from the wall for vent clearance
2. Connect the flexible gas connector to the dryer's gas inlet and to the shut-off valve
3. Tighten both connections hand-tight plus 1/4 turn with a wrench
4. Connect the 4" vent duct to the dryer exhaust port
5. Test for gas leaks: apply soapy water to all connections — bubbles indicate a leak
6. Plug in the 120V power cord (gas dryers use standard outlets, not 240V)
PRO TIP: Never use white Teflon tape on gas lines — use yellow gas-rated Teflon tape or pipe thread compound rated for gas.
→ Gorilla tape — when regular tape just doesn't cut it: amzn.to/3kmyKhS
→ 142 tools in one box — the kit that handles everything: amzn.to/3ZD1UJV
→ The little brush that reaches places nothing else can: amzn.to/3YfjIsA
More tools we use and love:
Subscribe for weekly DIY home repair: youtube.com/@Housebarons
As an Amazon Associate I earn from qualifying purchases. This helps support the channel at no extra cost to you.
#GasDryer #WhirlpoolDryer #DryerInstall #LaundryDIY #ApplianceInstall
About this tutorial
HouseBarons published this 8:45 video tutorial on March 4, 2020. It has been watched 214,930 times on YouTube.
- Channel
- HouseBarons
- Category
- Howto & Style
- Duration
- 8:45
- Published
- March 4, 2020
- Views
- 214,930
- Likes
- 2,084
Tags
Share
This tutorial in other languages
- FRComment faire pour installer un séchoir à gaz Whirlpool
- ESCómo instalar una secadora a gas de Whirlpool
- PTComo instalar um secador de gás Whirlpool
- ITCome installare un asciugatore a gas Whirlpool
- DESo installieren Sie einen Whirlpool Gastrockner
- NLHoe maak je een Whirlpool Gas Dryer Install
- RUКак установить Whirlpool Газовая сушилка
- PLJak zainstalować Whirlpool Gaz włosów
- JAワールプールガス乾燥機をインストールする方法
- ARكيفية تثبيت دوامة الغاز مجفف
- HIएक भँवर गैस ड्रायर स्थापित करने के लिए कैसे
- IDCara Menginstal Whirlpool Gas Dryer