Playback starts YouTube’s embedded player (privacy-enhanced mode).
How to Make a Raspberry Pi Smart Mirror
ChannelHacker ShackIn brief
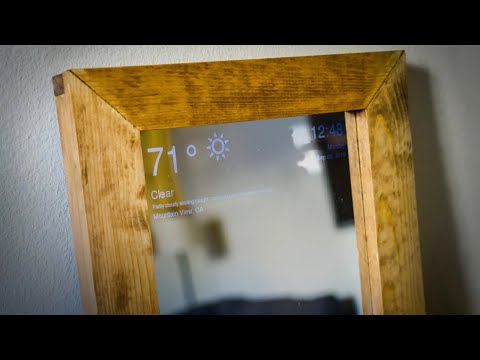
Build a modular smart mirror using a Raspberry Pi to display weather, news, and custom apps—ideal for morning routines. The project involves assembling a frame, mounting a monitor, and applying a two-way mirror surface, with flexibility to reposition or wall-mount it later. The creator uses a Pi 3 but notes compatibility with other models.
Questions & answers
What monitor size is used?
The creator uses a low-profile monitor, such as an old LED display.
Can I use a thicker acrylic sheet instead of the 1mm mirror?
Yes, but you’ll need to apply one-way mirror film to the clear acrylic instead.
Description from the creator
In this video, we give you some detailed instructions on how to make an easy raspberry pi powered home smart mirror. A smart mirror displays applications so that you can check the weather, local news, etc. while you are getting ready in the morning. It's also modular, so you can easy move it around or hang it on the wall if you like. We've created a basic application that you can run on the smart mirror, but it's totally customizable if you want to write some of your own code. We use a Raspberry Pi 3 in this video, but you can also use an A, B+ or any other Pi.
Check our hackaday.io page for a full parts list: hackaday.io/project/13466-raspberry-pi-smart-mi…
Get the 3D printable part files for this project on our Patreon: patreon.com/posts/smart-mirror-37732540
LINKS:
Github project: github.com/HackerShackOfficial/Smart-Mirror
To Subscribe: youtube.com/channel/UCEcNXmr7DYq1XxpWHSxaN0w?su…
Get our 3D printer: robo3d.myshopify.com?rfsn=1004615.c5abe
MATERIALS:
1 x Raspberry Pi 3
Amazon Affiliate Link - goo.gl/oVJcxK
1 x Low profile monitor (we used an old led display)
Amazon Affiliate Link - goo.gl/a4HeP5
12 ft - 1x2
12 ft - 1x3
1 x Wood glue
1 x Low profile HDMI cable
Amazon Affiliate Link - goo.gl/BzBTT8
1 x 18" - 24" Acrylic See-Through Mirror, 1mm
Amazon Affiliate Link - goo.gl/mpvZWE
You could also use a piece of one way film and a clear acrylic sheet
Amazon Affiliate Link - goo.gl/pTgUQy
*NOTE* - The above mirror might be too flexible and cause some distortion if it is not sandwiched properly. You could also use a thicker piece of clear acrylic and apply some one way mirror film: amazon.com/Mirror-Window-Film-Wide-Roll/dp/B004…
We did not experiment with this, so results may vary.
Subscribe to Hacker Shack: youtube.com/channel/UCEcNXmr7DYq1XxpWHSxaN0w?su…
Follow Hacker Shack on Instagram:
instagram.com/hackershackofficial/?hl=en
MUSIC:
DJ Quads - Stop: soundcloud.com/aka-dj-quads/lady-vlog-music
*Disclaimer*
The methods shown in this video should be used
as a guide only.
HACKER SHACK ACCEPTS NO RESPONSIBILITY FOR
ACCIDENTS OR INCIDENTS ARISING FROM INDIVIDUALS
UNDERTAKING ANY OF THE TASKS DESCRIBED. IN
PARTICULAR, IF UNSURE YOU SHOULD ALWAYS CONTACT
A QUALIFIED TRADESMAN BEFORE PROCEEDING.
Check our hackaday.io page for a full parts list: hackaday.io/project/13466-raspberry-pi-smart-mi…
Get the 3D printable part files for this project on our Patreon: patreon.com/posts/smart-mirror-37732540
LINKS:
Github project: github.com/HackerShackOfficial/Smart-Mirror
To Subscribe: youtube.com/channel/UCEcNXmr7DYq1XxpWHSxaN0w?su…
Get our 3D printer: robo3d.myshopify.com?rfsn=1004615.c5abe
MATERIALS:
1 x Raspberry Pi 3
Amazon Affiliate Link - goo.gl/oVJcxK
1 x Low profile monitor (we used an old led display)
Amazon Affiliate Link - goo.gl/a4HeP5
12 ft - 1x2
12 ft - 1x3
1 x Wood glue
1 x Low profile HDMI cable
Amazon Affiliate Link - goo.gl/BzBTT8
1 x 18" - 24" Acrylic See-Through Mirror, 1mm
Amazon Affiliate Link - goo.gl/mpvZWE
You could also use a piece of one way film and a clear acrylic sheet
Amazon Affiliate Link - goo.gl/pTgUQy
*NOTE* - The above mirror might be too flexible and cause some distortion if it is not sandwiched properly. You could also use a thicker piece of clear acrylic and apply some one way mirror film: amazon.com/Mirror-Window-Film-Wide-Roll/dp/B004…
We did not experiment with this, so results may vary.
Subscribe to Hacker Shack: youtube.com/channel/UCEcNXmr7DYq1XxpWHSxaN0w?su…
Follow Hacker Shack on Instagram:
instagram.com/hackershackofficial/?hl=en
MUSIC:
DJ Quads - Stop: soundcloud.com/aka-dj-quads/lady-vlog-music
*Disclaimer*
The methods shown in this video should be used
as a guide only.
HACKER SHACK ACCEPTS NO RESPONSIBILITY FOR
ACCIDENTS OR INCIDENTS ARISING FROM INDIVIDUALS
UNDERTAKING ANY OF THE TASKS DESCRIBED. IN
PARTICULAR, IF UNSURE YOU SHOULD ALWAYS CONTACT
A QUALIFIED TRADESMAN BEFORE PROCEEDING.
About this tutorial
Hacker Shack published this 13:46 video tutorial on November 1, 2016. It has been watched 4,458,033 times on YouTube.
- Channel
- Hacker Shack
- Category
- Science & Technology
- Duration
- 13:46
- Published
- November 1, 2016
- Views
- 4,458,033
- Likes
- 70,631
Tags
Share
This tutorial in other languages
- FRComment faire un Raspberry Pi intelligent miroir
- ESCómo hacer un espejo Frambuesa Pi inteligente
- PTComo fazer um Raspberry Pi inteligente Espelho
- ITCome fare un Raspberry Pi intelligente Specchio
- DEWie man ein Raspberry Pi Smart-Mirror-Stellen
- NLHoe maak je een Raspberry Pi Smart Mirror
- RUКак сделать Raspberry Pi Смарт зеркало
- PLJak zrobić Raspberry Pi Inteligentny lustra
- JAラズベリーパイスマートミラーを作る方法
- ARكيفية جعل التوت بي مرآة الذكية
- HIएक रास्पबेरी Pi स्मार्ट आईना बनाने के लिए कैसे
- IDCara Membuat Raspberry Pi Mirror Smart