Playback starts YouTube’s embedded player (privacy-enhanced mode).
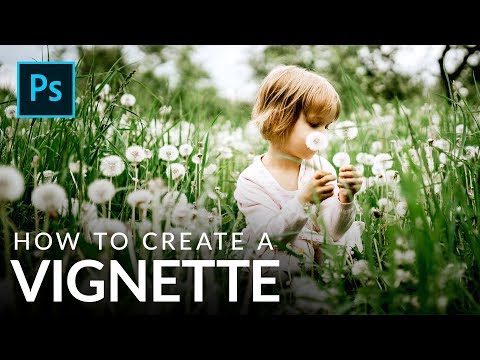
How to Create a Vignette in Photoshop
ChannelPHLEARNChapters
Description from the creator
▶ Download the sample image and PDF guide for this tutorial (free with a PHLEARN account): phlearn.com/tutorial/create-vignette-photoshop/
Want to draw the eye straight to your subject without touching a single selection tool on their face? A vignette does it in seconds by brightening your subject and gently darkening the edges of the frame. In this episode we show you how to create a natural-looking vignette that reads as part of the photo, not something obviously done in Photoshop.
The trick to a realistic vignette is all in how you work: staying zoomed out while you build it and using a heavy blur so there's no visible edge. We'll show you how to add light to your subject first, then add a second, darker vignette around the outside to really pull focus where you want it.
CHAPTERS
00:00 Intro to Creating a Vignette
00:58 Making a Selection Around Your Subject
02:19 Blurring the Vignette Edge Naturally
03:48 Adding a Darker Outer Vignette
05:20 Blurring and Transforming the Dark Edge
06:33 Before and After Results
THE STEPS
1. Zoom out on your image so you can judge the effect on the photo as a whole
2. Use the Elliptical Marquee Tool to draw a selection around your subject
3. Add a Curves Adjustment Layer, then drag the midpoint up to brighten the selected area
4. While still zoomed out, go to Filter, then Blur, then Blur Gallery, then Gaussian Blur, and raise the radius on the layer mask until the edge disappears
5. Draw a second, larger ellipse selection that covers most of the frame
6. Add another Curves Adjustment Layer and drag the midpoint down, then invert the layer mask so the outer edges darken instead of the center
7. Apply a large-radius Gaussian Blur to that layer mask as well, staying zoomed out
8. Use Transform (Command/Control+T) to widen the outer vignette if the edges need to be pulled in further
Get the full step by step breakdown here: phlearn.com/tutorial/create-vignette-photoshop/
―
PHLEARN PRO: every PRO tutorial, one membership
◦ 200+ in-depth courses and masterclasses on Photoshop, Lightroom and photography
◦ 1,000+ downloadable PSDs, RAW images and sample files to follow along
◦ Presets, Photoshop actions and LUTs included
◦ New PRO tutorials every month, streamed in 4K with captions and chapters
◦ Rated 4.93/5 by 3,900+ students
◦ Cancel anytime, 100% money-back guarantee
▶ phlearn.com/pro
―――――――――――――――
Follow PHLEARN:
Instagram: instagram.com/phlearn/
Facebook: facebook.com/phlearn
Twitter: twitter.com/phlearn
#Photoshop #Vignette #PhotoshopTutorial
Want to draw the eye straight to your subject without touching a single selection tool on their face? A vignette does it in seconds by brightening your subject and gently darkening the edges of the frame. In this episode we show you how to create a natural-looking vignette that reads as part of the photo, not something obviously done in Photoshop.
The trick to a realistic vignette is all in how you work: staying zoomed out while you build it and using a heavy blur so there's no visible edge. We'll show you how to add light to your subject first, then add a second, darker vignette around the outside to really pull focus where you want it.
CHAPTERS
00:00 Intro to Creating a Vignette
00:58 Making a Selection Around Your Subject
02:19 Blurring the Vignette Edge Naturally
03:48 Adding a Darker Outer Vignette
05:20 Blurring and Transforming the Dark Edge
06:33 Before and After Results
THE STEPS
1. Zoom out on your image so you can judge the effect on the photo as a whole
2. Use the Elliptical Marquee Tool to draw a selection around your subject
3. Add a Curves Adjustment Layer, then drag the midpoint up to brighten the selected area
4. While still zoomed out, go to Filter, then Blur, then Blur Gallery, then Gaussian Blur, and raise the radius on the layer mask until the edge disappears
5. Draw a second, larger ellipse selection that covers most of the frame
6. Add another Curves Adjustment Layer and drag the midpoint down, then invert the layer mask so the outer edges darken instead of the center
7. Apply a large-radius Gaussian Blur to that layer mask as well, staying zoomed out
8. Use Transform (Command/Control+T) to widen the outer vignette if the edges need to be pulled in further
Get the full step by step breakdown here: phlearn.com/tutorial/create-vignette-photoshop/
―
PHLEARN PRO: every PRO tutorial, one membership
◦ 200+ in-depth courses and masterclasses on Photoshop, Lightroom and photography
◦ 1,000+ downloadable PSDs, RAW images and sample files to follow along
◦ Presets, Photoshop actions and LUTs included
◦ New PRO tutorials every month, streamed in 4K with captions and chapters
◦ Rated 4.93/5 by 3,900+ students
◦ Cancel anytime, 100% money-back guarantee
▶ phlearn.com/pro
―――――――――――――――
Follow PHLEARN:
Instagram: instagram.com/phlearn/
Facebook: facebook.com/phlearn
Twitter: twitter.com/phlearn
#Photoshop #Vignette #PhotoshopTutorial
About this tutorial
PHLEARN published this 7:12 video tutorial on November 9, 2019. It has been watched 165,063 times on YouTube.
Tags
Share
This tutorial in other languages
- FRComment créer une vignette dans Photoshop
- ESCómo crear una viñeta en Photoshop
- PTComo criar uma vinheta no Photoshop
- ITCome creare una vignetta in Photoshop
- DESo erstellen Sie eine Vignette in Photoshop
- NLHoe maak je een Vignette in Photoshop aanmaken
- RUКак создать виньетку в Photoshop
- PLJak utworzyć winiety w Photoshopie
- JAPhotoshopでビネットを作成する方法
- ARكيفية إنشاء المقالة القصيرة في برنامج فوتوشوب
- HIकैसे Photoshop में एक विनेट बनाने के लिए
- IDCara Membuat Vignette di Photoshop