Playback starts YouTube’s embedded player (privacy-enhanced mode).
How to Define Brush in Photoshop CS6
ChannelPhotoshop Design and Photo editing Tutorials from HowTechDescription from the creator
Learn how to define brush in Adobe Photoshop.
Don't forget to check out our site howtech.tv/ for more free how-to videos!
youtube.com/ithowtovids - our feed
facebook.com/howtechtv - join us on facebook
plus.google.com/103440382717658277879 - our group in Google+
In this video tutorial we will show you how to define photoshop brush.
Launch the Adobe Photoshop. Go to the "File" menu, press "Open" and choose the image you want to make brush of. Right-click on the "Background Layer" and choose "Layer from Background".
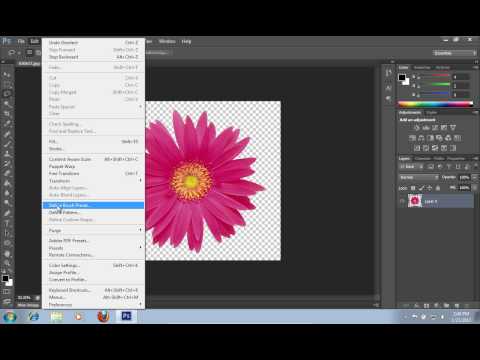
In appeared "New Layer" window, press "Ok". Then select the "Magic Wand Tool" from the toolbar. Click on the empty area in your image. Press "Delete" key to delete unnecessary image area. Choose "Lasso tool" from the toolbar and unselect the image. Then go to the "Edit" menu and choose "Define Brush Preset".
On the "Brush Name" window, type name for the new brush and click "Ok". Close the image. Go to "File" menu, press "New". In the appeared window select settings and press "Ok". Choose "Brush tool" from the toolbar. From the "Brush tool" menu select newly created brush. Adjust the size of the brush. Click on a "Color Picker", select the color and click "Ok".
Now test newly created brush.
Don't forget to check out our site howtech.tv/ for more free how-to videos!
youtube.com/ithowtovids - our feed
facebook.com/howtechtv - join us on facebook
plus.google.com/103440382717658277879 - our group in Google+
In this video tutorial we will show you how to define photoshop brush.
Launch the Adobe Photoshop. Go to the "File" menu, press "Open" and choose the image you want to make brush of. Right-click on the "Background Layer" and choose "Layer from Background".
In appeared "New Layer" window, press "Ok". Then select the "Magic Wand Tool" from the toolbar. Click on the empty area in your image. Press "Delete" key to delete unnecessary image area. Choose "Lasso tool" from the toolbar and unselect the image. Then go to the "Edit" menu and choose "Define Brush Preset".
On the "Brush Name" window, type name for the new brush and click "Ok". Close the image. Go to "File" menu, press "New". In the appeared window select settings and press "Ok". Choose "Brush tool" from the toolbar. From the "Brush tool" menu select newly created brush. Adjust the size of the brush. Click on a "Color Picker", select the color and click "Ok".
Now test newly created brush.
About this tutorial
Photoshop Design and Photo editing Tutorials from HowTech published this 1:44 video tutorial on November 10, 2013. It has been watched 89,655 times on YouTube.
- Category
- Howto & Style
- Duration
- 1:44
- Published
- November 10, 2013
- Views
- 89,655
- Likes
- 394
Share
This tutorial in other languages
- FRComment définir la brosse dans Photoshop CS6
- ESCómo Definir pincel en Photoshop CS6
- PTComo definir a escova em Photoshop CS6
- ITCome Definisci pennello in Photoshop CS6
- DESo definieren Pinsel in Photoshop CS6
- NLHoe te Brush definiëren in Photoshop CS6
- RUКак определить кисть в Photoshop CS6
- PLJak zdefiniować pędzel w Photoshop CS6
- JAPhotoshopのCS6でブラシを定義する方法
- ARكيفية تعريف فرشاة في فوتوشوب CS6
- HIफ़ोटोशॉप CS6 में ब्रश को परिभाषित करने के लिए कैसे
- IDCara Define Brush di Photoshop CS6