Playback starts YouTube’s embedded player (privacy-enhanced mode).
How to Create Lighting Effects in Photoshop
ChannelPHLEARNChapters
Description from the creator
▶ Download the sample image and PDF guide for this tutorial (free with a PHLEARN account): phlearn.com/tutorial/lighting-effects-photoshop/
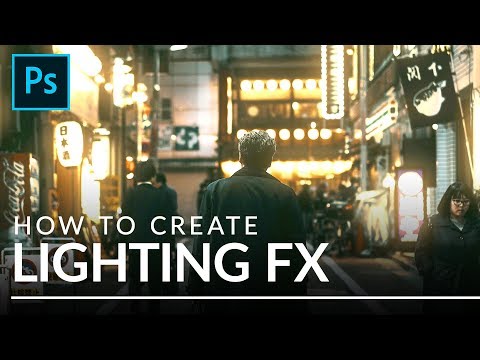
Give the light sources in any photo more color, presence, and a cinematic glow, all non-destructively, using Channels, a Solid Color fill layer, and a little Gaussian Blur.
In this tutorial, we'll show you how to isolate light sources with Channels, recolor them with a Solid Color fill layer and blend modes, add a soft cinematic glow, and cool down the shadows for contrast.
CHAPTERS
00:00 Intro to Lighting Effects
00:54 Isolating Lights With Channels
01:45 Loading a Selection From a Channel
02:42 Refining the Layer Mask With Levels
04:18 Changing Blend Modes for Color
05:42 Duplicating for a Stronger Effect
06:36 Adding a Cinematic Glow With Blur
08:42 Cooling Shadows With Selective Color
THE STEPS
1. Open the Channels panel and check Red, Green, and Blue individually to find whichever one shows the most contrast between your light sources and the background.
2. Command or Control click that channel's thumbnail to load it as a selection.
3. Create a new Solid Color Fill layer while that selection is active, it will automatically load into the layer's mask, then choose a warm or cool color for your lights.
4. Hold Alt or Option and click the layer mask to inspect it, then use Levels to push the black point up so only the true light sources stay visible.
5. Paint black directly on the layer mask with a soft brush to remove any areas, like the ground or unrelated signage, that shouldn't pick up the color.
6. Change the fill layer's blending mode from Normal to Overlay, Screen, or Soft Light so the color actually blends with the light sources instead of flatly covering them.
7. Duplicate the color layer and adjust each copy's blend mode or color separately for a stronger, richer effect, or to give different areas of the image different colors.
8. Duplicate one of your color layers again, set it to white, then apply Filter, then Blur, then Gaussian Blur directly to its layer mask to create a soft glow around each light source.
9. Add a Selective Color adjustment layer, select Neutrals, and push slightly toward Cyan to cool down your shadows and add contrast against the warm lights.
―
PHLEARN PRO: every PRO tutorial, one membership
◦ 200+ in-depth courses and masterclasses on Photoshop, Lightroom and photography
◦ 1,000+ downloadable PSDs, RAW images and sample files to follow along
◦ Presets, Photoshop actions and LUTs included
◦ New PRO tutorials every month, streamed in 4K with captions and chapters
◦ Rated 4.93/5 by 3,900+ students
◦ Cancel anytime, 100% money-back guarantee
▶ phlearn.com/pro
―――――――――――――――
Follow PHLEARN:
Instagram: instagram.com/phlearn/
Facebook: facebook.com/phlearn
Twitter: twitter.com/phlearn
#photoshoptutorial #colorgrading #lightingeffects
Give the light sources in any photo more color, presence, and a cinematic glow, all non-destructively, using Channels, a Solid Color fill layer, and a little Gaussian Blur.
In this tutorial, we'll show you how to isolate light sources with Channels, recolor them with a Solid Color fill layer and blend modes, add a soft cinematic glow, and cool down the shadows for contrast.
CHAPTERS
00:00 Intro to Lighting Effects
00:54 Isolating Lights With Channels
01:45 Loading a Selection From a Channel
02:42 Refining the Layer Mask With Levels
04:18 Changing Blend Modes for Color
05:42 Duplicating for a Stronger Effect
06:36 Adding a Cinematic Glow With Blur
08:42 Cooling Shadows With Selective Color
THE STEPS
1. Open the Channels panel and check Red, Green, and Blue individually to find whichever one shows the most contrast between your light sources and the background.
2. Command or Control click that channel's thumbnail to load it as a selection.
3. Create a new Solid Color Fill layer while that selection is active, it will automatically load into the layer's mask, then choose a warm or cool color for your lights.
4. Hold Alt or Option and click the layer mask to inspect it, then use Levels to push the black point up so only the true light sources stay visible.
5. Paint black directly on the layer mask with a soft brush to remove any areas, like the ground or unrelated signage, that shouldn't pick up the color.
6. Change the fill layer's blending mode from Normal to Overlay, Screen, or Soft Light so the color actually blends with the light sources instead of flatly covering them.
7. Duplicate the color layer and adjust each copy's blend mode or color separately for a stronger, richer effect, or to give different areas of the image different colors.
8. Duplicate one of your color layers again, set it to white, then apply Filter, then Blur, then Gaussian Blur directly to its layer mask to create a soft glow around each light source.
9. Add a Selective Color adjustment layer, select Neutrals, and push slightly toward Cyan to cool down your shadows and add contrast against the warm lights.
―
PHLEARN PRO: every PRO tutorial, one membership
◦ 200+ in-depth courses and masterclasses on Photoshop, Lightroom and photography
◦ 1,000+ downloadable PSDs, RAW images and sample files to follow along
◦ Presets, Photoshop actions and LUTs included
◦ New PRO tutorials every month, streamed in 4K with captions and chapters
◦ Rated 4.93/5 by 3,900+ students
◦ Cancel anytime, 100% money-back guarantee
▶ phlearn.com/pro
―――――――――――――――
Follow PHLEARN:
Instagram: instagram.com/phlearn/
Facebook: facebook.com/phlearn
Twitter: twitter.com/phlearn
#photoshoptutorial #colorgrading #lightingeffects
About this tutorial
PHLEARN published this 10:39 video tutorial on October 31, 2019. It has been watched 92,411 times on YouTube.
Tags
Share
This tutorial in other languages
- FRComment créer des effets d'éclairage dans Photoshop
- ESCómo crear efectos de iluminación en Photoshop
- PTComo criar efeitos de iluminação em Photoshop
- ITCome creare effetti di illuminazione in Photoshop
- DESo erstellen Sie Lichteffekte in Photoshop
- NLHoe maak Lighting Effects in Photoshop
- RUСоздание эффектов освещения в Photoshop
- PLJak tworzyć efekty oświetlenia w Photoshopie
- JAPhotoshopの照明効果を作成する方法
- ARكيفية إنشاء تأثيرات الإضاءة في برنامج فوتوشوب
- HIPhotoshop में प्रकाश प्रभाव बनाने के लिए कैसे
- IDCara Membuat Efek Pencahayaan di Photoshop