Playback starts YouTube’s embedded player (privacy-enhanced mode).
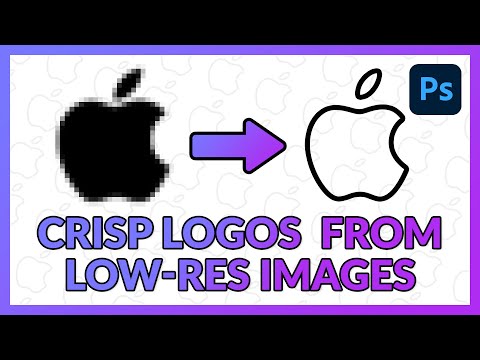
How to Create Vector Logos from Low-Resolution Images in Photoshop
ChannelPHLEARNChapters
Description from the creator
▶ Download the 2 sample images and PDF guide for this tutorial (free with a PHLEARN account): phlearn.com/tutorial/vector-logos-from-low-reso…
Need a clean copy of a logo but all you have is a tiny, low-resolution JPEG or PNG? We show you how to turn any low-resolution icon or graphic into an infinitely scalable vector with perfect sharpness, using the Shape Tools, the Pen Tool, and Paths in Photoshop.
We recreate two different logos, an Adobe icon and the Apple logo, so you can see two techniques: building simple geometric shapes with the Rectangle and Polygon tools, and hand-tracing complex curves with the Pen Tool. Once you understand these tools, you can trace and recreate almost any logo in a matter of minutes.
CHAPTERS
0:00 Intro To Vectorizing Low-Res Logos
0:56 Raster Vs Vector Explained
2:53 Drawing The Base Shape With Rectangle Tool
4:52 Using The Pen Tool For Curves
7:14 Converting Your Path Into A Shape
8:53 Merging Shapes Together
9:22 Reviewing The Finished Vector Icon
10:26 Tracing The Apple Logo With The Pen Tool
13:27 Controlling Curve Handles With Ctrl And Alt
14:54 Converting The Apple Path To A Shape
16:19 Adding A Stroke To Your Shape
17:22 Wrapping Up And Next Steps
THE STEPS
1. Start with the highest resolution version of your logo or icon you have
2. Use the Shape tools, Rectangle, Ellipse, and Polygon, to draw simple geometric parts
3. Use the Pen Tool to draw custom curves, placing points only where the angle changes
4. Hold Ctrl or Cmd to adjust both curve handles together, or Alt or Option to adjust just one side
5. Convert a finished path into a shape using the button at the top of the options bar
6. Merge overlapping shapes together to combine or cut out sections
7. Add a fill or stroke to your finished vector shape
8. Scale your finished vector infinitely with no loss of resolution
―
PHLEARN PRO: every PRO tutorial, one membership
◦ 200+ in-depth courses and masterclasses on Photoshop, Lightroom and photography
◦ 1,000+ downloadable PSDs, RAW images and sample files to follow along
◦ Presets, Photoshop actions and LUTs included
◦ New PRO tutorials every month, streamed in 4K with captions and chapters
◦ Rated 4.93/5 by 3,900+ students
◦ Cancel anytime, 100% money-back guarantee
▶ phlearn.com/pro
―――――――――――――――
Follow PHLEARN:
Instagram: instagram.com/phlearn/
Facebook: facebook.com/phlearn
X: x.com/phlearn
#photoshoptutorial #vectorgraphics #phlearn
Need a clean copy of a logo but all you have is a tiny, low-resolution JPEG or PNG? We show you how to turn any low-resolution icon or graphic into an infinitely scalable vector with perfect sharpness, using the Shape Tools, the Pen Tool, and Paths in Photoshop.
We recreate two different logos, an Adobe icon and the Apple logo, so you can see two techniques: building simple geometric shapes with the Rectangle and Polygon tools, and hand-tracing complex curves with the Pen Tool. Once you understand these tools, you can trace and recreate almost any logo in a matter of minutes.
CHAPTERS
0:00 Intro To Vectorizing Low-Res Logos
0:56 Raster Vs Vector Explained
2:53 Drawing The Base Shape With Rectangle Tool
4:52 Using The Pen Tool For Curves
7:14 Converting Your Path Into A Shape
8:53 Merging Shapes Together
9:22 Reviewing The Finished Vector Icon
10:26 Tracing The Apple Logo With The Pen Tool
13:27 Controlling Curve Handles With Ctrl And Alt
14:54 Converting The Apple Path To A Shape
16:19 Adding A Stroke To Your Shape
17:22 Wrapping Up And Next Steps
THE STEPS
1. Start with the highest resolution version of your logo or icon you have
2. Use the Shape tools, Rectangle, Ellipse, and Polygon, to draw simple geometric parts
3. Use the Pen Tool to draw custom curves, placing points only where the angle changes
4. Hold Ctrl or Cmd to adjust both curve handles together, or Alt or Option to adjust just one side
5. Convert a finished path into a shape using the button at the top of the options bar
6. Merge overlapping shapes together to combine or cut out sections
7. Add a fill or stroke to your finished vector shape
8. Scale your finished vector infinitely with no loss of resolution
―
PHLEARN PRO: every PRO tutorial, one membership
◦ 200+ in-depth courses and masterclasses on Photoshop, Lightroom and photography
◦ 1,000+ downloadable PSDs, RAW images and sample files to follow along
◦ Presets, Photoshop actions and LUTs included
◦ New PRO tutorials every month, streamed in 4K with captions and chapters
◦ Rated 4.93/5 by 3,900+ students
◦ Cancel anytime, 100% money-back guarantee
▶ phlearn.com/pro
―――――――――――――――
Follow PHLEARN:
Instagram: instagram.com/phlearn/
Facebook: facebook.com/phlearn
X: x.com/phlearn
#photoshoptutorial #vectorgraphics #phlearn
About this tutorial
PHLEARN published this 18:14 video tutorial on September 5, 2020. It has been watched 68,324 times on YouTube.
Tags
Share
This tutorial in other languages
- FRComment créer Vector Logos de basse résolution des images dans Photoshop
- ESCómo crear Logos Vector de imágenes de baja resolución en Photoshop
- PTComo criar Vector Logos de baixa resolução imagens no Photoshop
- ITCome creare Vector Logos da immagini a bassa risoluzione in Photoshop
- DESo erstellen Sie Vector Logos von Low-Resolution Bilder in Photoshop
- NLHoe kan ik Vector Logos maken van beelden met lage resolutie in Photoshop
- RUКак создать Векторные логотипы от низкого разрешения изображений в Photoshop
- PLJak utworzyć vector logo z niskiej rozdzielczości obrazy w Photoshopie
- JAPhotoshopで低解像度画像からのベクトルのロゴを作成する方法
- ARكيفية إنشاء ناقل شعارات من الصور منخفضة الدقة في فوتوشوب
- HIकैसे Photoshop में कम-रिज़ॉल्यूशन चित्र से वेक्टर लोगो बनाने के लिए
- IDCara Membuat Vector Logos dari Gambar Low-Resolusi di Photoshop