Playback starts YouTube’s embedded player (privacy-enhanced mode).
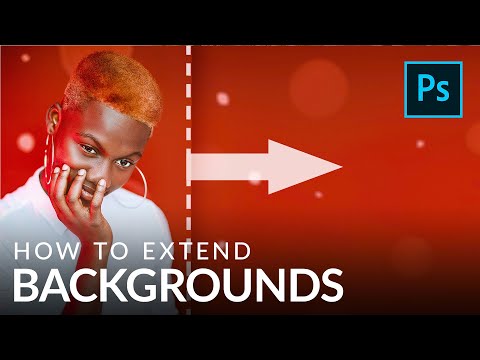
How to Extend Backgrounds in Photoshop
ChannelPHLEARNChapters
Description from the creator
▶ Download the sample image and PDF guide for this tutorial (free with a PHLEARN account): phlearn.com/tutorial/extend-backgrounds/
A tight portrait crop can be tricky to turn into a banner or graphic, but you don't need a matching stock photo or hand painting skills to extend a complicated background, just a brush tool and a plan.
In this tutorial, we'll show you how to extend a background with layered brush painting, recreate repeating shapes like circles, blend everything together with blur and grain, then mask it all in around your subject.
CHAPTERS
00:00 Intro to Extending Backgrounds
01:10 Extending the Canvas With Crop
02:00 Planning Your Layers in 3D
02:51 Painting In the Base Background
04:07 Building Gradient Variation With Low Flow
06:00 Recreating Circle Shapes and Blur
08:38 Adding Larger Circles for Depth
11:23 Masking the Effect Over Your Subject
12:26 Matching Grain With Noise
THE STEPS
1. Use the Crop tool to extend your canvas in the direction with the most usable background information to work with.
2. Plan your approach by layers, starting with whatever is furthest back, like the base background color, then working forward through any repeating shapes, then your subject.
3. On a new layer, sample a background color with Alt or Option and the Brush tool, then paint in the base tone at full flow and opacity, it's fine if it covers your subject for now.
4. On another new layer, lower your Brush tool's Flow to around 20 percent and build up color gradually in multiple passes for a smoother, more photographic gradient.
5. Use the Lasso or Elliptical Marquee tool to select repeating shapes like circles, fill them with a sampled color on their own new layer, then convert that layer to a Smart Object and apply a Box Blur to match the original photo's softness.
6. Group all your extension layers together, add a layer mask to the group, and paint black over your subject so the effect stays only in the extended area.
7. Convert the whole group to a Smart Object, then go to Filter, then Noise, then Add Noise, and dial in just enough grain to match the noise level of your original photo.
―
PHLEARN PRO: every PRO tutorial, one membership
◦ 200+ in-depth courses and masterclasses on Photoshop, Lightroom and photography
◦ 1,000+ downloadable PSDs, RAW images and sample files to follow along
◦ Presets, Photoshop actions and LUTs included
◦ New PRO tutorials every month, streamed in 4K with captions and chapters
◦ Rated 4.93/5 by 3,900+ students
◦ Cancel anytime, 100% money-back guarantee
▶ phlearn.com/pro
―――――――――――――――
Follow PHLEARN:
Instagram: instagram.com/phlearn/
Facebook: facebook.com/phlearn
Twitter: twitter.com/phlearn
#photoshoptutorial #compositing #photoshopbrush
A tight portrait crop can be tricky to turn into a banner or graphic, but you don't need a matching stock photo or hand painting skills to extend a complicated background, just a brush tool and a plan.
In this tutorial, we'll show you how to extend a background with layered brush painting, recreate repeating shapes like circles, blend everything together with blur and grain, then mask it all in around your subject.
CHAPTERS
00:00 Intro to Extending Backgrounds
01:10 Extending the Canvas With Crop
02:00 Planning Your Layers in 3D
02:51 Painting In the Base Background
04:07 Building Gradient Variation With Low Flow
06:00 Recreating Circle Shapes and Blur
08:38 Adding Larger Circles for Depth
11:23 Masking the Effect Over Your Subject
12:26 Matching Grain With Noise
THE STEPS
1. Use the Crop tool to extend your canvas in the direction with the most usable background information to work with.
2. Plan your approach by layers, starting with whatever is furthest back, like the base background color, then working forward through any repeating shapes, then your subject.
3. On a new layer, sample a background color with Alt or Option and the Brush tool, then paint in the base tone at full flow and opacity, it's fine if it covers your subject for now.
4. On another new layer, lower your Brush tool's Flow to around 20 percent and build up color gradually in multiple passes for a smoother, more photographic gradient.
5. Use the Lasso or Elliptical Marquee tool to select repeating shapes like circles, fill them with a sampled color on their own new layer, then convert that layer to a Smart Object and apply a Box Blur to match the original photo's softness.
6. Group all your extension layers together, add a layer mask to the group, and paint black over your subject so the effect stays only in the extended area.
7. Convert the whole group to a Smart Object, then go to Filter, then Noise, then Add Noise, and dial in just enough grain to match the noise level of your original photo.
―
PHLEARN PRO: every PRO tutorial, one membership
◦ 200+ in-depth courses and masterclasses on Photoshop, Lightroom and photography
◦ 1,000+ downloadable PSDs, RAW images and sample files to follow along
◦ Presets, Photoshop actions and LUTs included
◦ New PRO tutorials every month, streamed in 4K with captions and chapters
◦ Rated 4.93/5 by 3,900+ students
◦ Cancel anytime, 100% money-back guarantee
▶ phlearn.com/pro
―――――――――――――――
Follow PHLEARN:
Instagram: instagram.com/phlearn/
Facebook: facebook.com/phlearn
Twitter: twitter.com/phlearn
#photoshoptutorial #compositing #photoshopbrush
About this tutorial
PHLEARN published this 15:21 video tutorial on November 2, 2019. It has been watched 92,851 times on YouTube.
Tags
Share
This tutorial in other languages
- FRComment étendre Backgrounds dans Photoshop
- ESCómo extender Fondos en Photoshop
- PTComo estender Fundos em Photoshop
- ITCome estendere Sfondi in Photoshop
- DEWie zu verlängern Hintergründe in Photoshop
- NLHoe te achtergronden in Photoshop Extend
- RUКак продлить обои в Photoshop
- PLJak przedłużyć tła w Photoshopie
- JAPhotoshopで背景を拡張する方法
- ARكيفية توسيع الخلفيات في برنامج فوتوشوب
- HIकैसे में फ़ोटोशॉप पृष्ठभूमि का विस्तार करने के
- IDBagaimana Perluas Backgrounds di Photoshop