Playback starts YouTube’s embedded player (privacy-enhanced mode).
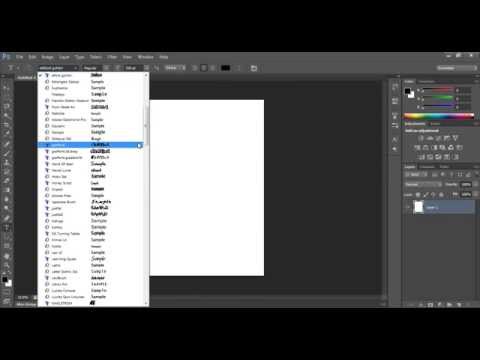
How To Add Fonts To Adobe Photoshop CS6/CS5/CS4/CC
ChannelJackDescription from the creator
Click here for a tutorial on adding brushes to photoshop - youtu.be/xsixuCFC1hE
Click here for the font website - dafont.com/
Read Below...
For the font I used - dafont.com/arcade-book.font
I used winrar to extract the font. If you dont have it you can get it below
youtube.com/watch?v=q7RG2020VEM
when extracting with winrar you only have to extract the font file, it should have a icon/thumbnail with an "a" on it, then extract it to your desktop, right click it, then install.
however you don't need to have it, after you click download, you can go in your downloads file, then find the file you downloaded. It should have a little icon/thumbnail with an "a" on it, right click, and then install. it should now be done!
Instructions when you have downloaded winrar
1. go to www.dafont.com
2. look around the website and find a font you like
3. click download to the right
4. open the download in winrar
5. click on the file with a icon/thumbnail which will have a "A" on it
6. click on "extract to"
7. then chose desktop and click ok
8. right click on the file you extracted
9. click install
10. open up photoshop, or which ever you want to use
11. click on fonts, and find it,
12. write something and it should have worked
Thanks for watching!
Click here for the font website - dafont.com/
Read Below...
For the font I used - dafont.com/arcade-book.font
I used winrar to extract the font. If you dont have it you can get it below
youtube.com/watch?v=q7RG2020VEM
when extracting with winrar you only have to extract the font file, it should have a icon/thumbnail with an "a" on it, then extract it to your desktop, right click it, then install.
however you don't need to have it, after you click download, you can go in your downloads file, then find the file you downloaded. It should have a little icon/thumbnail with an "a" on it, right click, and then install. it should now be done!
Instructions when you have downloaded winrar
1. go to www.dafont.com
2. look around the website and find a font you like
3. click download to the right
4. open the download in winrar
5. click on the file with a icon/thumbnail which will have a "A" on it
6. click on "extract to"
7. then chose desktop and click ok
8. right click on the file you extracted
9. click install
10. open up photoshop, or which ever you want to use
11. click on fonts, and find it,
12. write something and it should have worked
Thanks for watching!
About this tutorial
Jack published this 1:19 video tutorial on October 31, 2012. It has been watched 1,012,965 times on YouTube.
- Channel
- Jack
- Category
- Howto & Style
- Duration
- 1:19
- Published
- October 31, 2012
- Views
- 1,012,965
- Likes
- 3,921
Tags
Share
This tutorial in other languages
- FRComment ajouter des polices Adobe Photoshop CS6 / CS5 / CS4 / CC
- ESCómo agregar fuentes Para Adobe Photoshop CS6 / CS5 / CS4 / CC
- PTComo adicionar fontes Para Adobe Photoshop CS6 / CS5 / CS4 / CC
- ITCome aggiungere font in Adobe Photoshop CS6 / CS5 / CS4 / CC
- DEWie man Schriften in Adobe Photoshop CS6 / CS5 / CS4 / CC hinzufügen
- NLHow To Fonts u Adobe Photoshop CS6 / CS5 / CS4 / CC
- RUКак добавить шрифты в Adobe Photoshop CS6 / CS5 / CS4 / CC
- PLJak dodać czcionki do Adobe Photoshop CS6 / CS5 / CS4 / CC
- JAフォントにはAdobe PhotoshopのCS6 / CS5 / CS4 / CCを追加する方法
- ARكيفية إضافة خطوط لأدوبي فوتوشوب CS6 / CS5 / CS4 / CC
- HIकैसे फ़ॉन्ट्स करने के लिए एडोब फोटोशॉप CS6 / CS5 / CS4 / सीसी जोड़ें
- IDCara Tambah Font Untuk Adobe Photoshop CS6 / CS5 / CS4 / CC