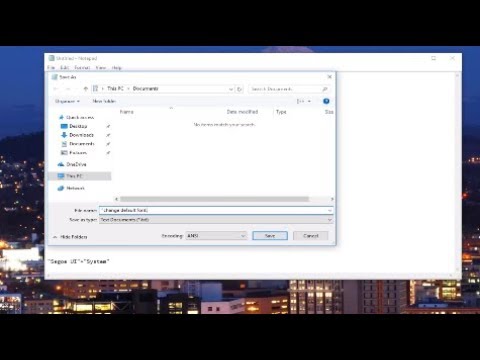
Playback starts YouTube’s embedded player (privacy-enhanced mode).
How To Change Default System Font In Windows 10
ChannelMDTechVideosDescription from the creator
How To Change Default System Font In Windows 10
Paste this into Notepad:
Windows Registry Editor Version 5.00
[HKEY_LOCAL_MACHINE\SOFTWARE\Microsoft\Windows NT\CurrentVersion\Fonts]
"Segoe UI (TrueType)"=""
"Segoe UI Bold (TrueType)"=""
"Segoe UI Bold Italic (TrueType)"=""
"Segoe UI Italic (TrueType)"=""
"Segoe UI Light (TrueType)"=""
"Segoe UI Semibold (TrueType)"=""
"Segoe UI Symbol (TrueType)"=""
[HKEY_LOCAL_MACHINE\SOFTWARE\Microsoft\Windows NT\CurrentVersion\FontSubstitutes]
"Segoe UI"="DESIRED FONT"
Windows 10 uses the Segoe UI font as the default system font. This font is used for icons, menus, title bar text, File Explorer, and more.
If you would like to use a different font, then you are able to change this default font to any font you like.
This tutorial will show you how to change the default system font in Windows 10 for all users.
You must be signed in as an administrator to be able to change the default font in Windows 10.
This tutorial will apply for computers, laptops, desktops,and tablets running the Windows 10 operating system (Home, Professional, Enterprise, Education) from all supported hardware manufactures, like Dell, HP, Acer, Asus, Toshiba,Lenovo, and Samsung).
Paste this into Notepad:
Windows Registry Editor Version 5.00
[HKEY_LOCAL_MACHINE\SOFTWARE\Microsoft\Windows NT\CurrentVersion\Fonts]
"Segoe UI (TrueType)"=""
"Segoe UI Bold (TrueType)"=""
"Segoe UI Bold Italic (TrueType)"=""
"Segoe UI Italic (TrueType)"=""
"Segoe UI Light (TrueType)"=""
"Segoe UI Semibold (TrueType)"=""
"Segoe UI Symbol (TrueType)"=""
[HKEY_LOCAL_MACHINE\SOFTWARE\Microsoft\Windows NT\CurrentVersion\FontSubstitutes]
"Segoe UI"="DESIRED FONT"
Windows 10 uses the Segoe UI font as the default system font. This font is used for icons, menus, title bar text, File Explorer, and more.
If you would like to use a different font, then you are able to change this default font to any font you like.
This tutorial will show you how to change the default system font in Windows 10 for all users.
You must be signed in as an administrator to be able to change the default font in Windows 10.
This tutorial will apply for computers, laptops, desktops,and tablets running the Windows 10 operating system (Home, Professional, Enterprise, Education) from all supported hardware manufactures, like Dell, HP, Acer, Asus, Toshiba,Lenovo, and Samsung).
About this tutorial
MDTechVideos published this 3:03 video tutorial on November 1, 2017. It has been watched 540,235 times on YouTube.
- Channel
- MDTechVideos
- Category
- Science & Technology
- Duration
- 3:03
- Published
- November 1, 2017
- Views
- 540,235
- Likes
- 4,241
Tags
Share
This tutorial in other languages
- FRComment faire pour modifier par défaut du système polices dans Windows 10
- ESCómo cambiar la fuente por defecto del sistema en Windows 10
- PTComo mudar padrão do sistema fonte no Windows 10
- ITCome modificare predefinito Font di sistema in Windows 10
- DESo ändern Standardsystemschriftart in Windows 10
- NLHow To Change Default System Font In Windows 10
- RUКак изменить систему по умолчанию шрифта в Windows 10
- PLJak zmienić domyślny system czcionki w systemie Windows 10
- JA変更は、システムフォントでのWindows 10のデフォルトの方法
- ARكيفية تغيير النظام الافتراضي الخط في نظام التشغيل Windows 10
- HIकैसे बदलें डिफ़ॉल्ट Windows 10 सिस्टम फ़ॉन्ट में
- IDCara Ganti Default Lihat Sistem Font Pada Windows 10