Playback starts YouTube’s embedded player (privacy-enhanced mode).
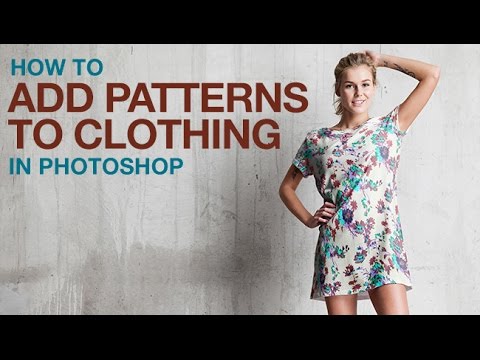
How to Add Patterns to Clothing in Photoshop
ChannelPHLEARNChapters
Description from the creator
▶ Download the PDF guide for this tutorial (free with a PHLEARN account): phlearn.com/tutorial/add-patterns-clothing-phot…
How to add a pattern or texture to clothing in Photoshop so it looks like it was actually printed on the fabric — not just pasted over it. This covers scaling a pattern into place, cutting the clothing out precisely with the Pen Tool, using Liquify to warp the pattern around folds, and rebuilding the original highlights and shadows on top so it reads as real fabric.
CHAPTERS
00:00 What we're making today
01:21 Scaling and inverting the pattern into place
03:41 Cutting out the clothing with the Pen Tool
08:32 Liquify: warping the pattern to fit the fabric
16:10 Adding shadows with the Multiply blend mode
18:16 Adding highlights with the Screen blend mode
22:06 Final review
THE STEPS
1. Drag the pattern into your document, scale and rotate it into place, and invert it (Cmd/Ctrl+I) if the color needs to flip.
2. Cut out the original clothing precisely with the Pen Tool, turn the path into a selection, feather it slightly, and load it as a layer mask for the pattern.
3. Use the Liquify Tool's Forward Warp and Freeze Mask to bend the pattern so it follows the folds of the fabric.
4. Duplicate the background layer, clip it to the pattern layer, and set it to Multiply to bring back the original shadows.
5. Duplicate the background again, clip it, set it to Screen, and use a Levels adjustment to isolate just the highlights.
6. Lower the pattern layer's opacity slightly (around 90%) so it blends naturally with the fabric underneath.
Read the full step-by-step tutorial:
phlearn.com/clothing-patterns-yt00-desc
―
PHLEARN PRO: every PRO tutorial, one membership
◦ 200+ in-depth courses and masterclasses on Photoshop, Lightroom and photography
◦ 1,000+ downloadable PSDs, RAW images and sample files to follow along
◦ Presets, Photoshop actions and LUTs included
◦ New PRO tutorials every month, streamed in 4K with captions and chapters
◦ Rated 4.93/5 by 3,900+ students
◦ Cancel anytime, 100% money-back guarantee
▶ phlearn.com/pro
―
Follow us on social!
Instagram: instagram.com/phlearn/
Facebook: facebook.com/phlearn
Twitter: twitter.com/phlearn
#Photoshop #PhotoCompositing #PhotoshopTutorial
How to add a pattern or texture to clothing in Photoshop so it looks like it was actually printed on the fabric — not just pasted over it. This covers scaling a pattern into place, cutting the clothing out precisely with the Pen Tool, using Liquify to warp the pattern around folds, and rebuilding the original highlights and shadows on top so it reads as real fabric.
CHAPTERS
00:00 What we're making today
01:21 Scaling and inverting the pattern into place
03:41 Cutting out the clothing with the Pen Tool
08:32 Liquify: warping the pattern to fit the fabric
16:10 Adding shadows with the Multiply blend mode
18:16 Adding highlights with the Screen blend mode
22:06 Final review
THE STEPS
1. Drag the pattern into your document, scale and rotate it into place, and invert it (Cmd/Ctrl+I) if the color needs to flip.
2. Cut out the original clothing precisely with the Pen Tool, turn the path into a selection, feather it slightly, and load it as a layer mask for the pattern.
3. Use the Liquify Tool's Forward Warp and Freeze Mask to bend the pattern so it follows the folds of the fabric.
4. Duplicate the background layer, clip it to the pattern layer, and set it to Multiply to bring back the original shadows.
5. Duplicate the background again, clip it, set it to Screen, and use a Levels adjustment to isolate just the highlights.
6. Lower the pattern layer's opacity slightly (around 90%) so it blends naturally with the fabric underneath.
Read the full step-by-step tutorial:
phlearn.com/clothing-patterns-yt00-desc
―
PHLEARN PRO: every PRO tutorial, one membership
◦ 200+ in-depth courses and masterclasses on Photoshop, Lightroom and photography
◦ 1,000+ downloadable PSDs, RAW images and sample files to follow along
◦ Presets, Photoshop actions and LUTs included
◦ New PRO tutorials every month, streamed in 4K with captions and chapters
◦ Rated 4.93/5 by 3,900+ students
◦ Cancel anytime, 100% money-back guarantee
▶ phlearn.com/pro
―
Follow us on social!
Instagram: instagram.com/phlearn/
Facebook: facebook.com/phlearn
Twitter: twitter.com/phlearn
#Photoshop #PhotoCompositing #PhotoshopTutorial
About this tutorial
PHLEARN published this 23:32 video tutorial on October 26, 2016. It has been watched 956,319 times on YouTube.
Tags
Share
This tutorial in other languages
- FRComment ajouter des motifs à l'habillement dans Photoshop
- ESCómo agregar patrones de ropa en Photoshop
- PTComo adicionar padrões de vestuário no Photoshop
- ITCome aggiungere modelli a Abbigliamento in Photoshop
- DEWie Patterns zu Kleidung in Photoshop hinzufügen
- NLHoe te Patterns Toevoegen aan kleding in Photoshop
- RUКак добавить шаблоны для одежды в Photoshop
- PLJak dodać do wzorów odzieży w Photoshopie
- JAPhotoshopで服にパターンを追加する方法
- ARكيفية إضافة أنماط إلى الملابس في فوتوشوب
- HIकैसे Photoshop में कपड़े के पैटर्न जोड़ें
- IDBagaimana Tambahkan Pola untuk Pakaian di Photoshop