Playback starts YouTube’s embedded player (privacy-enhanced mode).
How to Place Anything into Perspective in Photoshop
ChannelPHLEARNChapters
Description from the creator
▶ Download the 3 sample images, layered TIF and PDF guide for this tutorial (free with a PHLEARN account): phlearn.com/tutorial/place-anything-into-perspe…
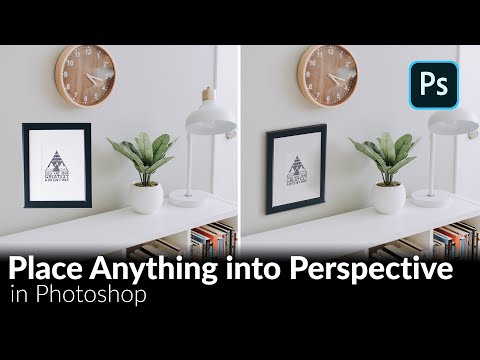
How to place anything into perfect perspective in Photoshop using the Vanishing Point filter — the tool that makes mockups and composites look real instead of pasted-on. This covers cutting an object out, matching the light direction and color of the new scene, and using Vanishing Point to bend it into the correct plane automatically.
CHAPTERS
00:00 The Vanishing Point Filter, explained
01:24 Matching perspective and light direction
06:03 Opening the Vanishing Point filter
08:15 Placing the object into the grid
10:14 Matching brightness to the scene
11:36 Adding depth with a shadow
15:03 Duplicating and varying the effect
18:22 Painting in a matching cast shadow
THE STEPS
1. Cut the object out onto its own layer and drag it into the new scene — it'll look flat and out of place at first.
2. Study the background photo's light direction (look at existing highlights and shadows) so your object matches it.
3. Open Filter, then Vanishing Point, and define a perspective plane that matches the surface you're placing the object onto.
4. Paste the object into the plane — Vanishing Point automatically warps it to fit the perspective.
5. Adjust brightness and color with an adjustment layer clipped to the object so it matches the scene's exposure.
6. Add a soft, masked shadow beneath the object to ground it in the scene.
Go deeper with the PHLEARN PRO course “How to Remove Backgrounds in Photoshop”: phlearn.com/tutorial/change-remove-backgrounds/
―
PHLEARN PRO: every PRO tutorial, one membership
◦ 200+ in-depth courses and masterclasses on Photoshop, Lightroom and photography
◦ 1,000+ downloadable PSDs, RAW images and sample files to follow along
◦ Presets, Photoshop actions and LUTs included
◦ New PRO tutorials every month, streamed in 4K with captions and chapters
◦ Rated 4.93/5 by 3,900+ students
◦ Cancel anytime, 100% money-back guarantee
▶ phlearn.com/pro
―
Follow us on social!
Instagram: instagram.com/phlearn/
Facebook: facebook.com/phlearn
Twitter: twitter.com/phlearn
#Photoshop #PhotoCompositing #PhotoshopTutorial
How to place anything into perfect perspective in Photoshop using the Vanishing Point filter — the tool that makes mockups and composites look real instead of pasted-on. This covers cutting an object out, matching the light direction and color of the new scene, and using Vanishing Point to bend it into the correct plane automatically.
CHAPTERS
00:00 The Vanishing Point Filter, explained
01:24 Matching perspective and light direction
06:03 Opening the Vanishing Point filter
08:15 Placing the object into the grid
10:14 Matching brightness to the scene
11:36 Adding depth with a shadow
15:03 Duplicating and varying the effect
18:22 Painting in a matching cast shadow
THE STEPS
1. Cut the object out onto its own layer and drag it into the new scene — it'll look flat and out of place at first.
2. Study the background photo's light direction (look at existing highlights and shadows) so your object matches it.
3. Open Filter, then Vanishing Point, and define a perspective plane that matches the surface you're placing the object onto.
4. Paste the object into the plane — Vanishing Point automatically warps it to fit the perspective.
5. Adjust brightness and color with an adjustment layer clipped to the object so it matches the scene's exposure.
6. Add a soft, masked shadow beneath the object to ground it in the scene.
Go deeper with the PHLEARN PRO course “How to Remove Backgrounds in Photoshop”: phlearn.com/tutorial/change-remove-backgrounds/
―
PHLEARN PRO: every PRO tutorial, one membership
◦ 200+ in-depth courses and masterclasses on Photoshop, Lightroom and photography
◦ 1,000+ downloadable PSDs, RAW images and sample files to follow along
◦ Presets, Photoshop actions and LUTs included
◦ New PRO tutorials every month, streamed in 4K with captions and chapters
◦ Rated 4.93/5 by 3,900+ students
◦ Cancel anytime, 100% money-back guarantee
▶ phlearn.com/pro
―
Follow us on social!
Instagram: instagram.com/phlearn/
Facebook: facebook.com/phlearn
Twitter: twitter.com/phlearn
#Photoshop #PhotoCompositing #PhotoshopTutorial
About this tutorial
PHLEARN published this 21:14 video tutorial on June 26, 2020. It has been watched 965,819 times on YouTube.
Tags
Share
This tutorial in other languages
- FRComment placer Tout en perspective dans Photoshop
- ESCómo colocar nada en perspectiva en Photoshop
- PTComo coloque nada em perspectiva no Photoshop
- ITCome collocare nulla in prospettiva in Photoshop
- DEWie Place Alles in Perspektive in Photoshop
- NLHoe maak je af met voorwerpen in Perspectief in Photoshop
- RUКак разместить что-либо в перспективе в Photoshop
- PLJak umieszczać żadnych przedmiotów w perspektywie w Photoshopie
- JAPhotoshopの視点に何を配置する方法
- ARكيفية وضع كل شيء في منظور في فوتوشوب
- HIकुछ में फ़ोटोशॉप परिप्रेक्ष्य में रखें कैसे
- IDCara Tempatkan Apa pun ke Perspektif di Photoshop