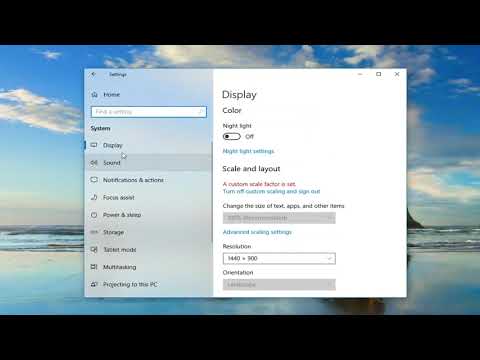
Playback starts YouTube’s embedded player (privacy-enhanced mode).
How to Take High Resolution Screenshots in Windows 10
ChannelMDTechVideosDescription from the creator
How to Take High Resolution Screenshots in Windows 10.
Capturing screenshots is a handy way to document and share information you want to make visible to others. By default, Windows OS features multiple options for taking high-resolution screenshots. These include keyboard shortcuts, Snipping Tool, etc. Having said that, you might have noticed, after capturing an image/screen from your Windows 10 computer its overall quality sometimes appears low. This occurs due to low resolution. If you want to get High-Resolution screenshots in Windows 10, make sure you do the following to enhance the clarity of your next screenshot.
The term resolution refers to the number of pixels (or dots per inch – DPI) per inch of the image. So, a higher resolution means improved quality.
Windows includes a number of options for taking high-resolution screenshots of the display, including keyboard shortcuts and the Snipping Tool provided with the operating system. These screenshots can be saved to disk, shared with colleagues or uploaded to the Web. If you're using the Windows key shortcut or the Snipping Tool, you have the option of capturing an individual program window rather than the entire screen, which is useful if you want to focus on one particular area.
This tutorial will apply for computers, laptops, desktops,and tablets running the Windows 10 operating system (Home, Professional, Enterprise, Education) from all supported hardware manufactures, like Dell, HP, Acer, Asus, Toshiba,Lenovo, and Samsung).
Capturing screenshots is a handy way to document and share information you want to make visible to others. By default, Windows OS features multiple options for taking high-resolution screenshots. These include keyboard shortcuts, Snipping Tool, etc. Having said that, you might have noticed, after capturing an image/screen from your Windows 10 computer its overall quality sometimes appears low. This occurs due to low resolution. If you want to get High-Resolution screenshots in Windows 10, make sure you do the following to enhance the clarity of your next screenshot.
The term resolution refers to the number of pixels (or dots per inch – DPI) per inch of the image. So, a higher resolution means improved quality.
Windows includes a number of options for taking high-resolution screenshots of the display, including keyboard shortcuts and the Snipping Tool provided with the operating system. These screenshots can be saved to disk, shared with colleagues or uploaded to the Web. If you're using the Windows key shortcut or the Snipping Tool, you have the option of capturing an individual program window rather than the entire screen, which is useful if you want to focus on one particular area.
This tutorial will apply for computers, laptops, desktops,and tablets running the Windows 10 operating system (Home, Professional, Enterprise, Education) from all supported hardware manufactures, like Dell, HP, Acer, Asus, Toshiba,Lenovo, and Samsung).
About this tutorial
MDTechVideos published this 1:49 video tutorial on November 2, 2019. It has been watched 305,747 times on YouTube.
- Channel
- MDTechVideos
- Category
- Science & Technology
- Duration
- 1:49
- Published
- November 2, 2019
- Views
- 305,747
- Likes
- 1,340
Tags
Share
This tutorial in other languages
- FRComment prendre haute résolution d'écran dans Windows 10
- ESCómo tomar de alta resolución de pantalla en Windows 10
- PTComo fazer exame de alta resolução Imagens no Windows 10
- ITCome prendere ad alta risoluzione Immagini in Windows 10
- DEWie Take Hohe Auflösung Screenshots in Windows 10
- NLHoe om te hoge resolutie Screenshots onder Windows 10
- RUКак принять High Resolution Скриншоты в Windows 10
- PLJak wziąć wysokiej rozdzielczości ekranu w systemie Windows 10
- JAWindowsの10で高解像度のスクリーンショットを撮る方法
- ARكيفية اتخاذ عالية الدقة لقطات في نظام التشغيل Windows 10
- HIWindows 10 में उच्च रिज़ॉल्यूशन स्क्रीनशॉट ले लो करने के लिए कैसे
- IDBagaimana Mengambil Resolusi Tinggi Screenshots pada Windows 10