The creator does not allow this video to be played on other websites. You can watch it directly on YouTube.
How to Turn Off Autocorrect on iPhone and iPad
ChanneliPhone, iPad and Android Tutorials from HowTechDescription from the creator
Autocorrect feature on iPhone is widely famous for changing words, intentions, lives and destinies since Apple introduced the feature.
Autocorrect is the perfect excuse for cursing someone and for nasty messages that you wanted to send for a long time to your friends and partners and to whatever you might have slipped in your conversation by sending the text. There are some funny, sad or horror stories connected to Autocorrect.
Step 1. When we tap "Notes" from home screen and tap "New" to start writing a new travel note, we can see Autocorrect is on and in action. It does not know about certain geographical names and replaces them with rather weird word choices.
Step 2. When Autocorrect provides you more trouble than help, it's time to disable it. Press home button to return to home screen. Tap "Settings" app and select "General".
Step 3. Tap "Keyboard".
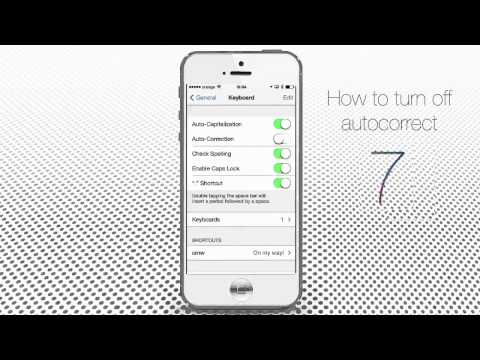
Step 4. Turn the Auto-Correction slider to OFF: from green to white.
Step 5. Now when Auto-Correction function was disabled, press home button to return to home screen and tap again Notes app. Let's tap the name of the previous note that we did not manage to write properly. Now we can enter any geographical name, any nickname or slang word without fear of being autocorrected.
Result: Congratulations! You have received the right of making your mistakes when typing, not someone else's :). This was a HowTech tutorial.
Like us on Facebook, love us forever or leave us a comment here in the fields below :) Thanks for watching!
Autocorrect is the perfect excuse for cursing someone and for nasty messages that you wanted to send for a long time to your friends and partners and to whatever you might have slipped in your conversation by sending the text. There are some funny, sad or horror stories connected to Autocorrect.
Step 1. When we tap "Notes" from home screen and tap "New" to start writing a new travel note, we can see Autocorrect is on and in action. It does not know about certain geographical names and replaces them with rather weird word choices.
Step 2. When Autocorrect provides you more trouble than help, it's time to disable it. Press home button to return to home screen. Tap "Settings" app and select "General".
Step 3. Tap "Keyboard".
Step 4. Turn the Auto-Correction slider to OFF: from green to white.
Step 5. Now when Auto-Correction function was disabled, press home button to return to home screen and tap again Notes app. Let's tap the name of the previous note that we did not manage to write properly. Now we can enter any geographical name, any nickname or slang word without fear of being autocorrected.
Result: Congratulations! You have received the right of making your mistakes when typing, not someone else's :). This was a HowTech tutorial.
Like us on Facebook, love us forever or leave us a comment here in the fields below :) Thanks for watching!
About this tutorial
iPhone, iPad and Android Tutorials from HowTech published this 1:30 video tutorial on November 2, 2013. It has been watched 759,028 times on YouTube.
- Category
- Howto & Style
- Duration
- 1:30
- Published
- November 2, 2013
- Views
- 759,028
- Likes
- 4,287
Tags
Share
This tutorial in other languages
- FRComment désactiver la correction automatique sur iPhone et iPad
- ESCómo desactivar la autocorrección en el iPhone y el iPad
- PTComo desativar Autocorrect no iPhone e iPad
- ITCome disattivare Correzione automatica su iPhone e iPad
- DESo deaktivieren Sie Autocorrect auf iPhone und iPad
- NLHoe kan uitschakelen AutoCorrectie op de iPhone en iPad
- RUКак отключить автокоррекцию на iPhone и IPad
- PLJak wyłączyć Autokorekta na iPhone i iPad
- JAiPhoneやiPadでオートコレクトをオフにする方法
- ARكيفية إيقاف التصحيح التلقائي على iPhone و iPad
- HIiPhone और iPad पर बंद स्वतः सुधार चालू करने के लिए कैसे
- IDCara Turn Off Autocorrect pada iPhone dan iPad