Playback starts YouTube’s embedded player (privacy-enhanced mode).
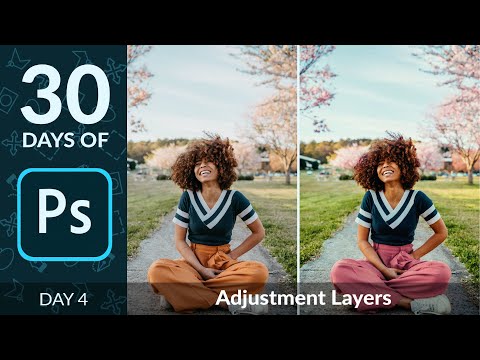
How to Use Adjustment Layers in Photoshop | Day 4
ChannelPHLEARNChapters
Description from the creator
▶ Download the practice files for this tutorial (free with a PHLEARN account): phlearn.com/tutorial/30-days-photoshop-how-to-u…
In Day 4 of 30 Days of Photoshop, learn every major adjustment layer in Photoshop and how to use each one to edit your photos non-destructively.
We work through Brightness/Contrast, Levels, Curves, Vibrance, Hue/Saturation, Color Balance, Black & White, Photo Filter, Channel Mixer, Gradient Map, and Selective Color, then group them together to compare a full before and after.
CHAPTERS
00:00 Why adjustment layers are non-destructive
01:12 Brightness/Contrast adjustment layer
03:14 Levels adjustment layer
05:00 Curves adjustment layer
06:51 Vibrance adjustment layer
08:09 Hue/Saturation adjustment layer
13:28 Color Balance adjustment layer
14:27 Black & White adjustment layer
15:12 Photo Filter adjustment layer
15:50 Channel Mixer adjustment layer
18:34 Gradient Map adjustment layer
19:29 Selective Color adjustment layer
THE STEPS
1. Go to Layer, then New Adjustment Layer, to see every option available
2. Use Levels or Curves for precise brightness and contrast control
3. Use Vibrance to boost saturation without oversaturating skin tones
4. Use Hue/Saturation to shift or intensify specific colors
5. Use Color Balance or Selective Color for targeted color grading
6. Use Black & White or Gradient Map for tonal and color-toning effects
7. Group all your adjustment layers together
8. Lower the group's opacity to blend the before and after
Sign Up for 30 Days of Photoshop:
phlearn.com/30-days-of-photoshop-signup
―
PHLEARN PRO: every PRO tutorial, one membership
◦ 200+ in-depth courses and masterclasses on Photoshop, Lightroom and photography
◦ 1,000+ downloadable PSDs, RAW images and sample files to follow along
◦ Presets, Photoshop actions and LUTs included
◦ New PRO tutorials every month, streamed in 4K with captions and chapters
◦ Rated 4.93/5 by 3,900+ students
◦ Cancel anytime, 100% money-back guarantee
▶ phlearn.com/pro
―
Follow PHLEARN
Instagram: instagram.com/phlearn/
Facebook: facebook.com/PHLEARN
Twitter: twitter.com/PHLEARN
#Photoshop #PhotoshopBasics #AdjustmentLayers
In Day 4 of 30 Days of Photoshop, learn every major adjustment layer in Photoshop and how to use each one to edit your photos non-destructively.
We work through Brightness/Contrast, Levels, Curves, Vibrance, Hue/Saturation, Color Balance, Black & White, Photo Filter, Channel Mixer, Gradient Map, and Selective Color, then group them together to compare a full before and after.
CHAPTERS
00:00 Why adjustment layers are non-destructive
01:12 Brightness/Contrast adjustment layer
03:14 Levels adjustment layer
05:00 Curves adjustment layer
06:51 Vibrance adjustment layer
08:09 Hue/Saturation adjustment layer
13:28 Color Balance adjustment layer
14:27 Black & White adjustment layer
15:12 Photo Filter adjustment layer
15:50 Channel Mixer adjustment layer
18:34 Gradient Map adjustment layer
19:29 Selective Color adjustment layer
THE STEPS
1. Go to Layer, then New Adjustment Layer, to see every option available
2. Use Levels or Curves for precise brightness and contrast control
3. Use Vibrance to boost saturation without oversaturating skin tones
4. Use Hue/Saturation to shift or intensify specific colors
5. Use Color Balance or Selective Color for targeted color grading
6. Use Black & White or Gradient Map for tonal and color-toning effects
7. Group all your adjustment layers together
8. Lower the group's opacity to blend the before and after
Sign Up for 30 Days of Photoshop:
phlearn.com/30-days-of-photoshop-signup
―
PHLEARN PRO: every PRO tutorial, one membership
◦ 200+ in-depth courses and masterclasses on Photoshop, Lightroom and photography
◦ 1,000+ downloadable PSDs, RAW images and sample files to follow along
◦ Presets, Photoshop actions and LUTs included
◦ New PRO tutorials every month, streamed in 4K with captions and chapters
◦ Rated 4.93/5 by 3,900+ students
◦ Cancel anytime, 100% money-back guarantee
▶ phlearn.com/pro
―
Follow PHLEARN
Instagram: instagram.com/phlearn/
Facebook: facebook.com/PHLEARN
Twitter: twitter.com/PHLEARN
#Photoshop #PhotoshopBasics #AdjustmentLayers
About this tutorial
PHLEARN published this 21:17 video tutorial on January 31, 2020. It has been watched 516,109 times on YouTube.
Tags
Share
This tutorial in other languages
- FRComment utiliser des calques de réglage dans Photoshop | jour 4
- ESCómo utilizar capas de ajuste en Photoshop | Día 4
- PTComo Layers Use ajuste no Photoshop | dia 4
- ITCome livelli di regolazione in Photoshop Usa | 4 ° giorno
- DEWie zu verwenden Einstellungsebenen in Photoshop | Tag 4
- NLHoe te gebruiken Aanpassingslagen in Photoshop | dag 4
- RUКак использовать корректирующие слои в Photoshop | День 4
- PLJak Warstwy Zastosowanie regulacyjne w Photoshopie | dzień 4
- JAどのようにPhotoshopの使用調整レイヤーへ| 4日目
- ARكيفية استخدام طبقات التعديل في برنامج فوتوشوب | يوم 4
- HIकैसे में फोटोशॉप का प्रयोग करें समायोजन परतें को | 4 दिन
- IDCara Gunakan Penyesuaian Layers di Photoshop | hari 4